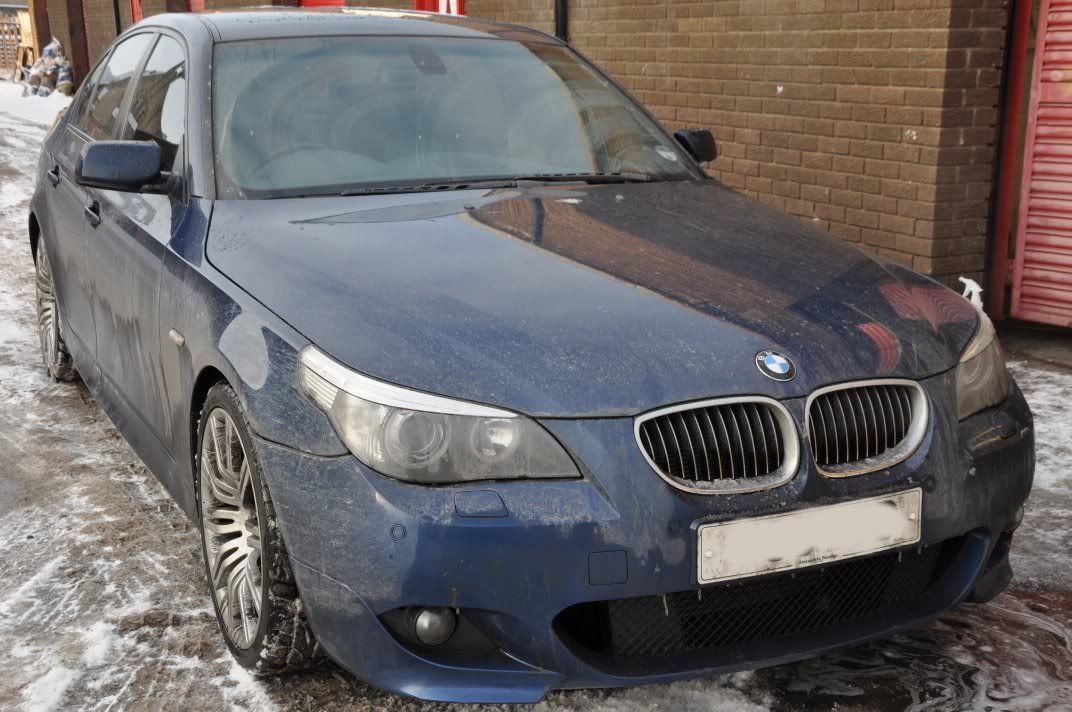
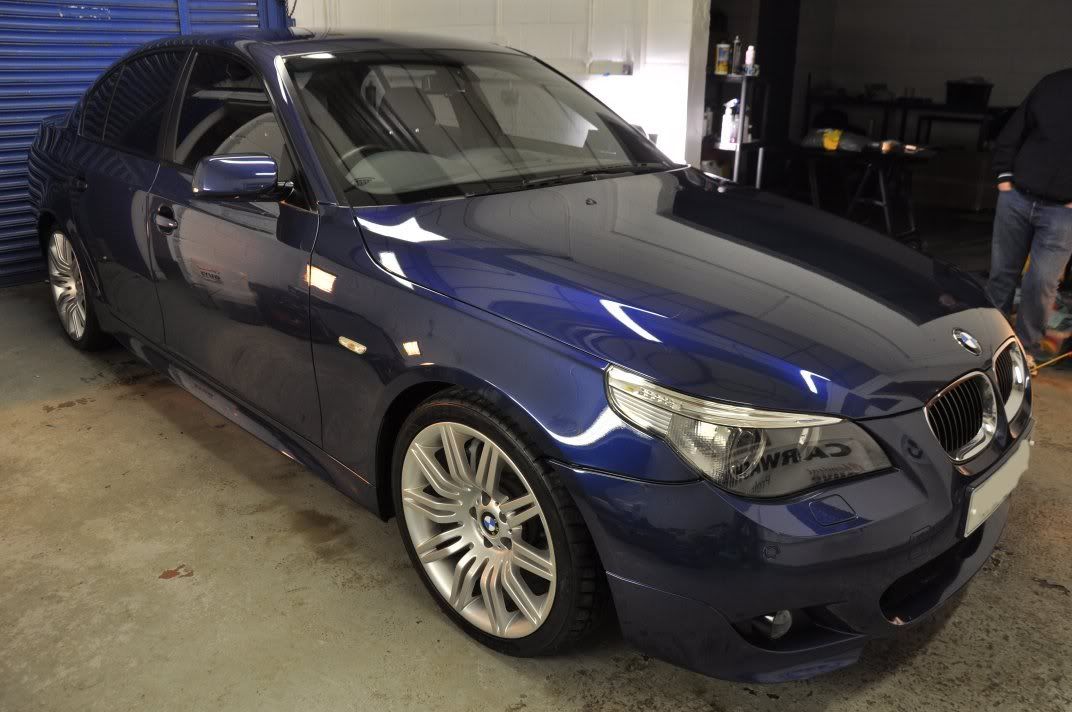
From this...
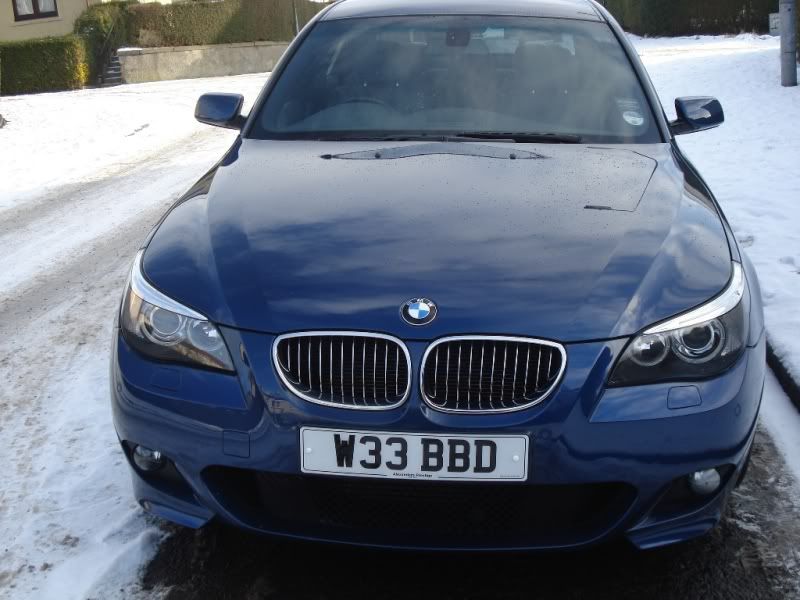
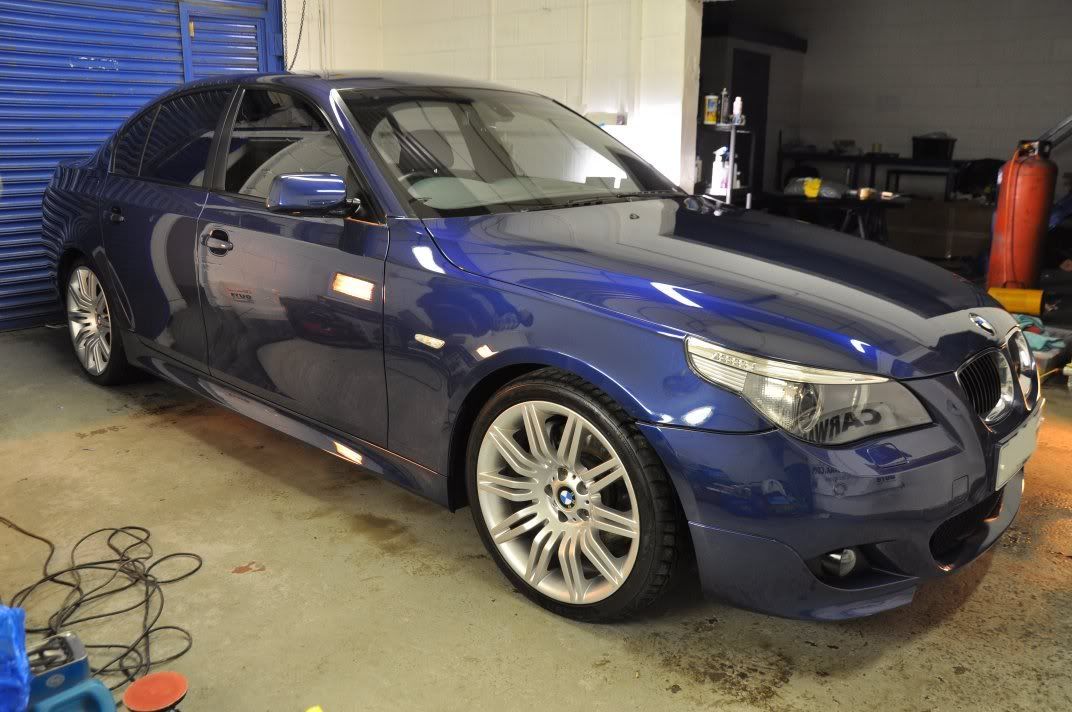
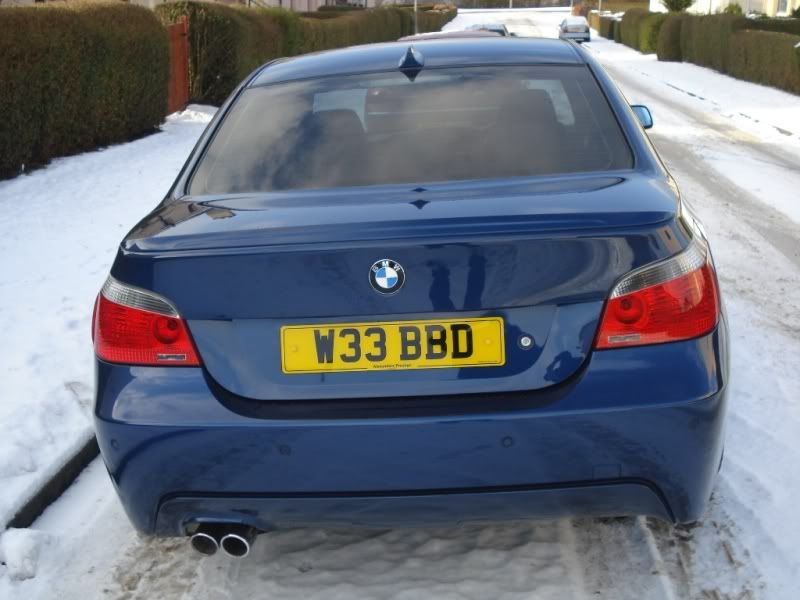
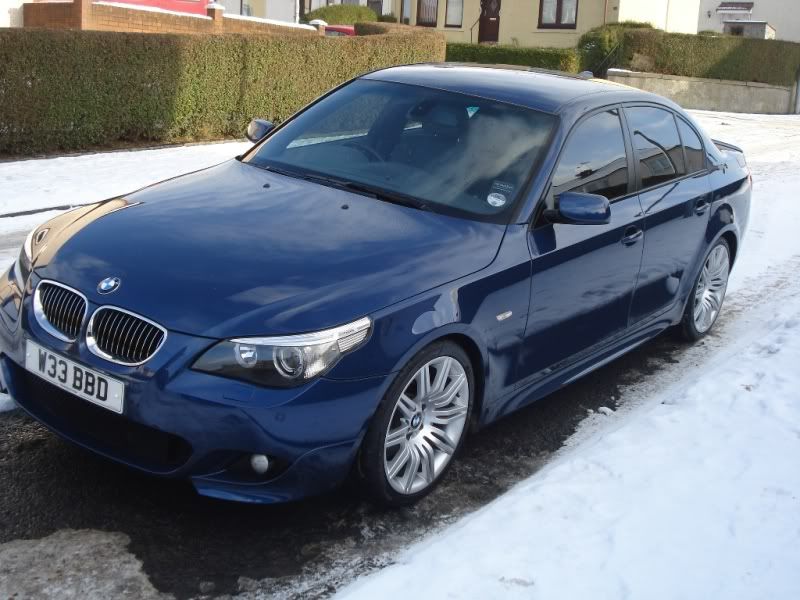
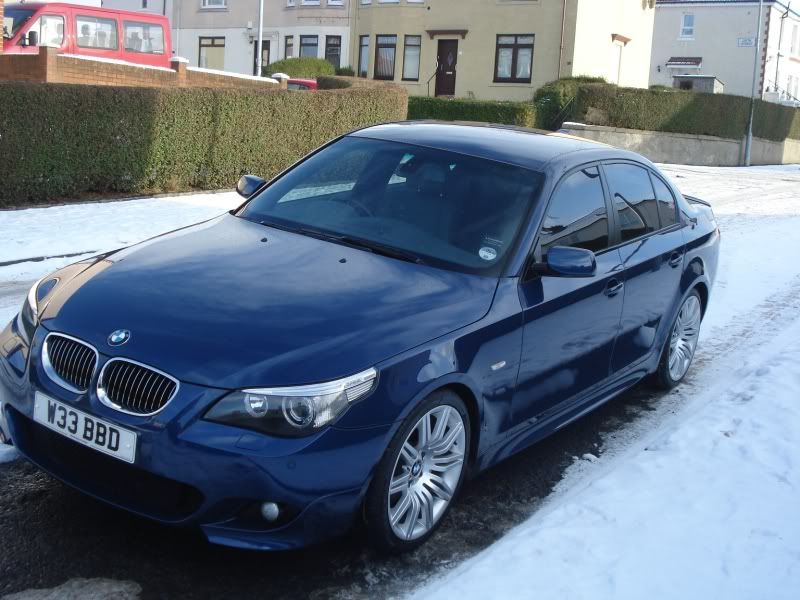
to this... (photograph taken by owner the day after the detail, after a drive home through the snow - many thanks for getting us daylight shots, as we finished the detail when it was dark!)
Its been a wee while since I last put a writeup in the Studio - upcoming interviews have been taking up a lot of my spare evening time of late so I haven't had much time to writeup our recent details. This detail was carried out in early January, the first of the year for Gordon and myself and a really nice car to kick off 2010 with Metallic blue E60 535d... The car had recently been purchased by the owner and the supplying dealer appeared to have already polished the car - more on that a little late. First up we had to wrap up nice and warm and set about defrosting the washing the car, which was suffering from the winter salt and snow...
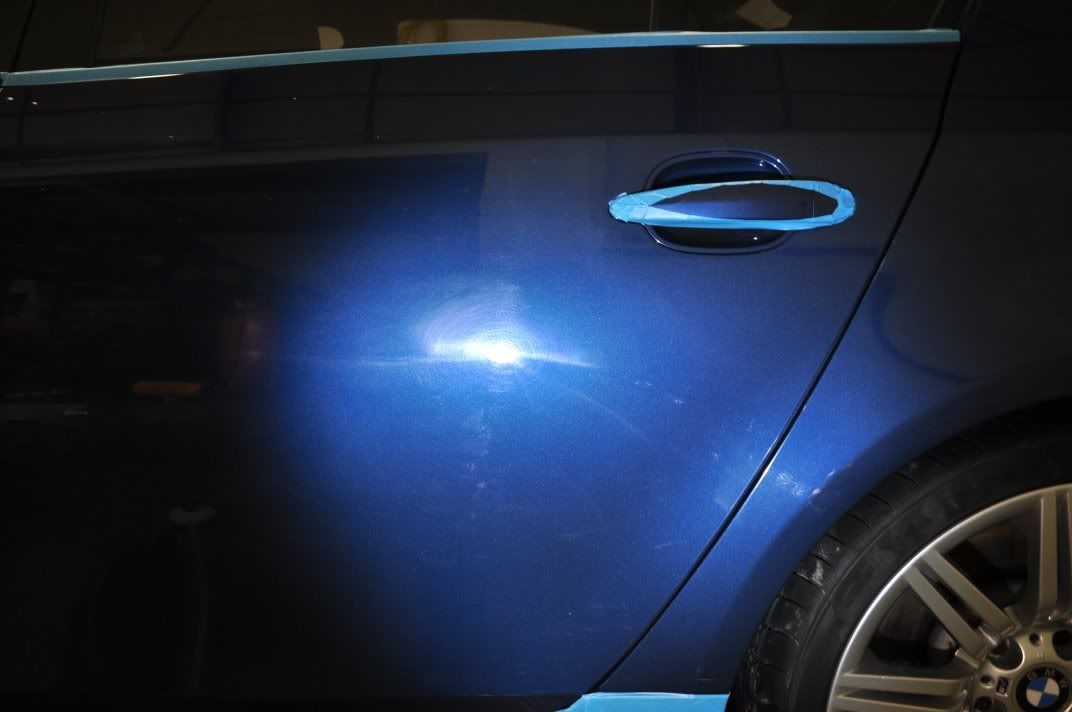
Our standard washing techniques were adopted once the car had been defrosted a little, and the car was readied for claying. Using Chemical Guys White clay and Last Touch as the clay lube, we worked round the car... Once fully clayed it allowed us to see the extent of the damage that had been caused to the paint by the previous polishing efforts!
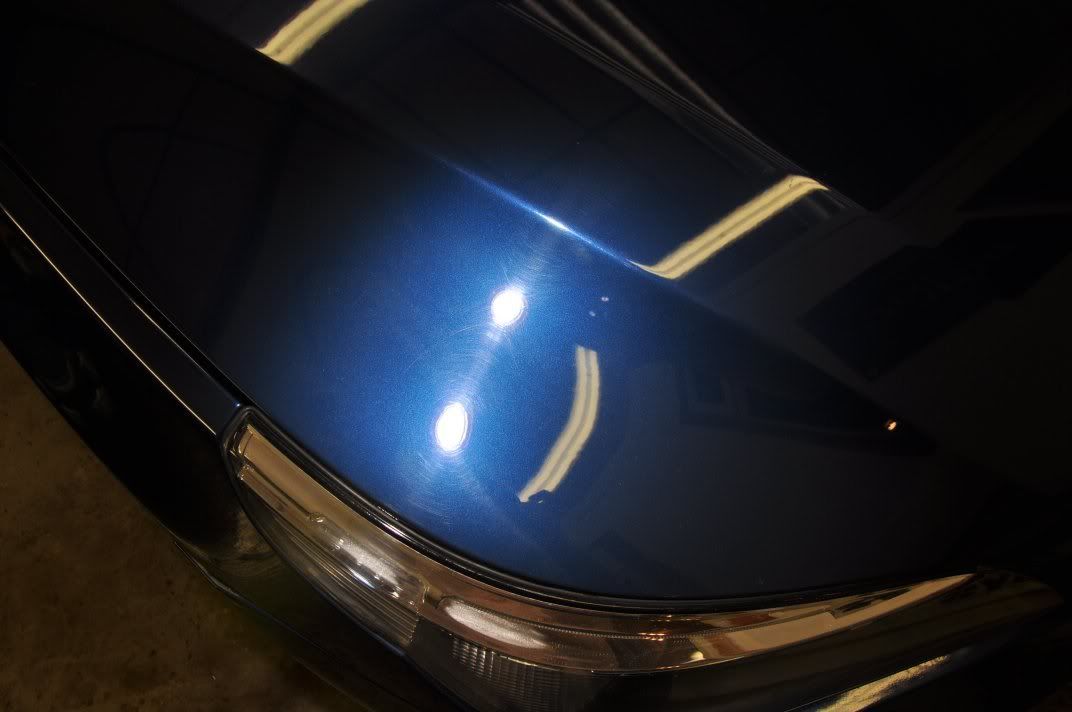
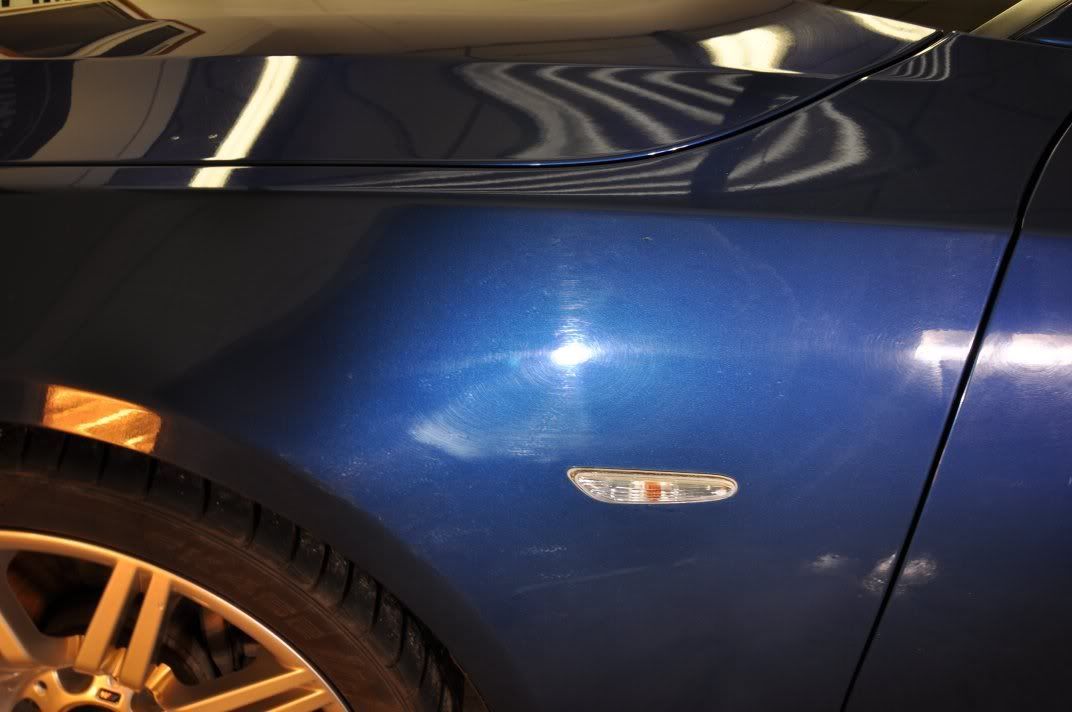
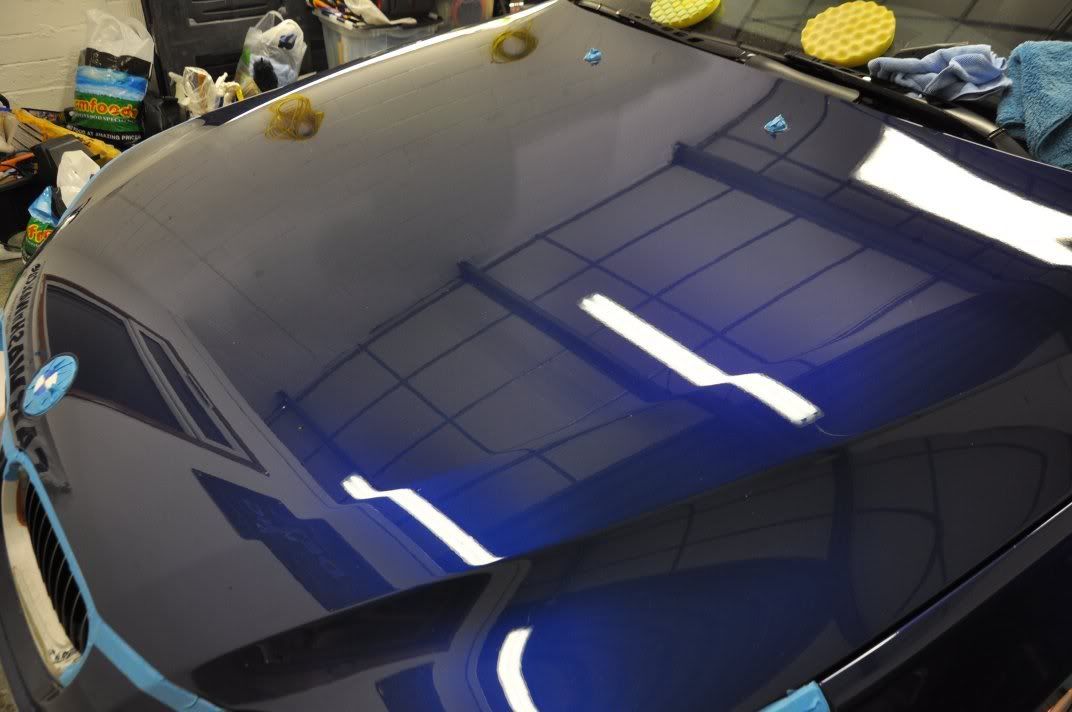
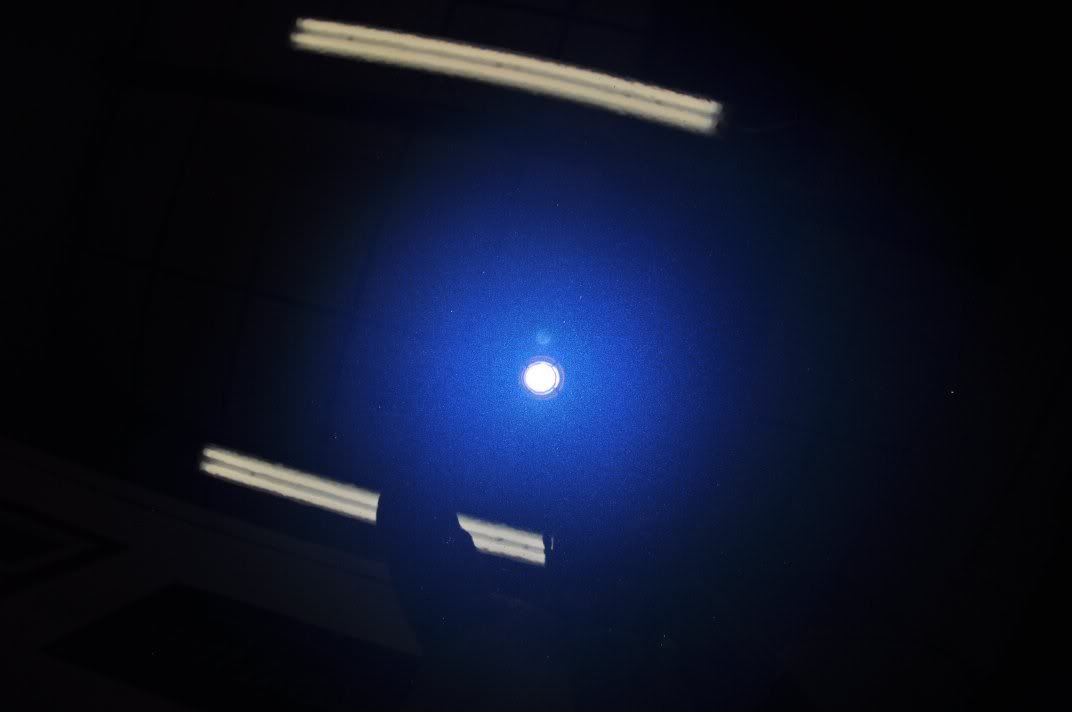
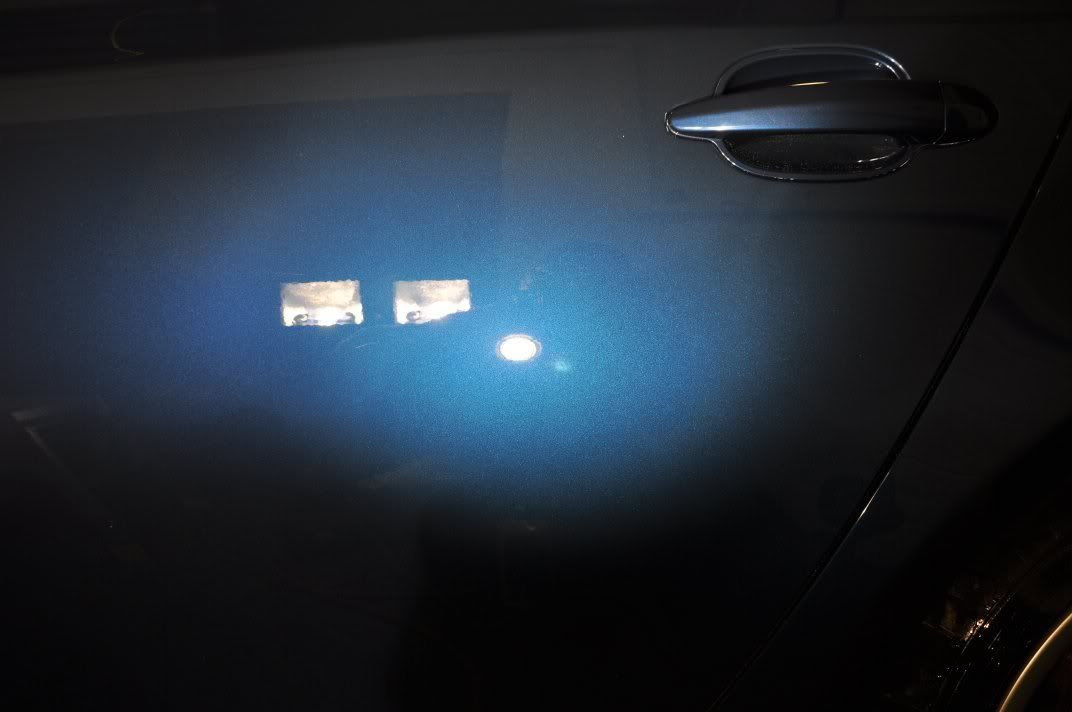
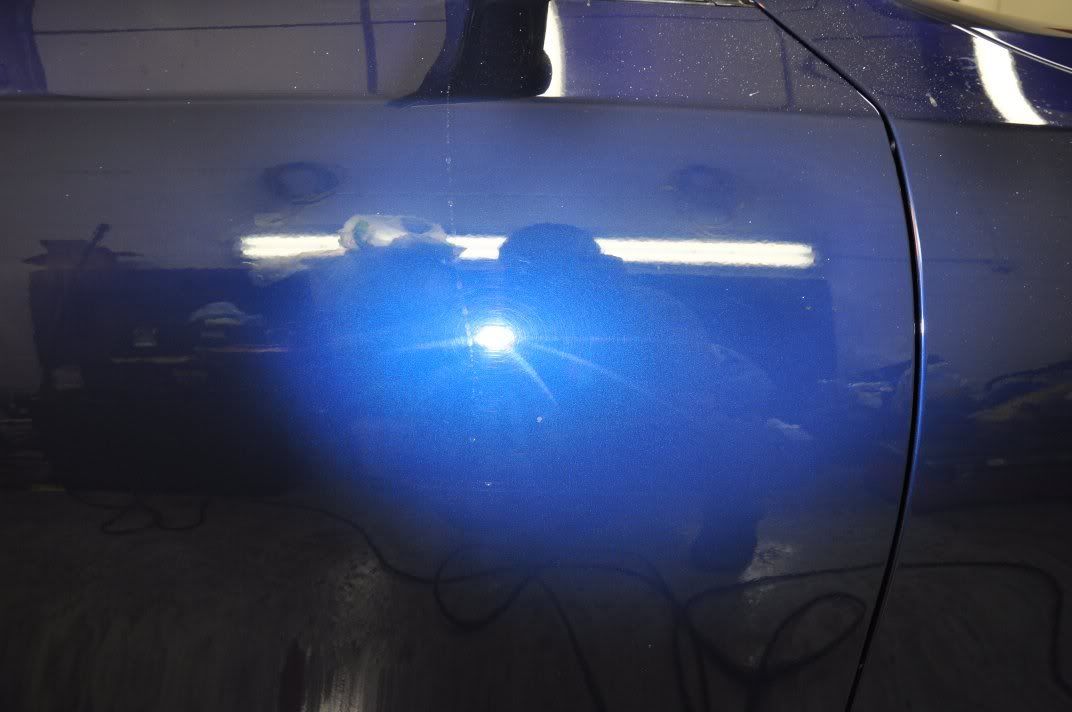
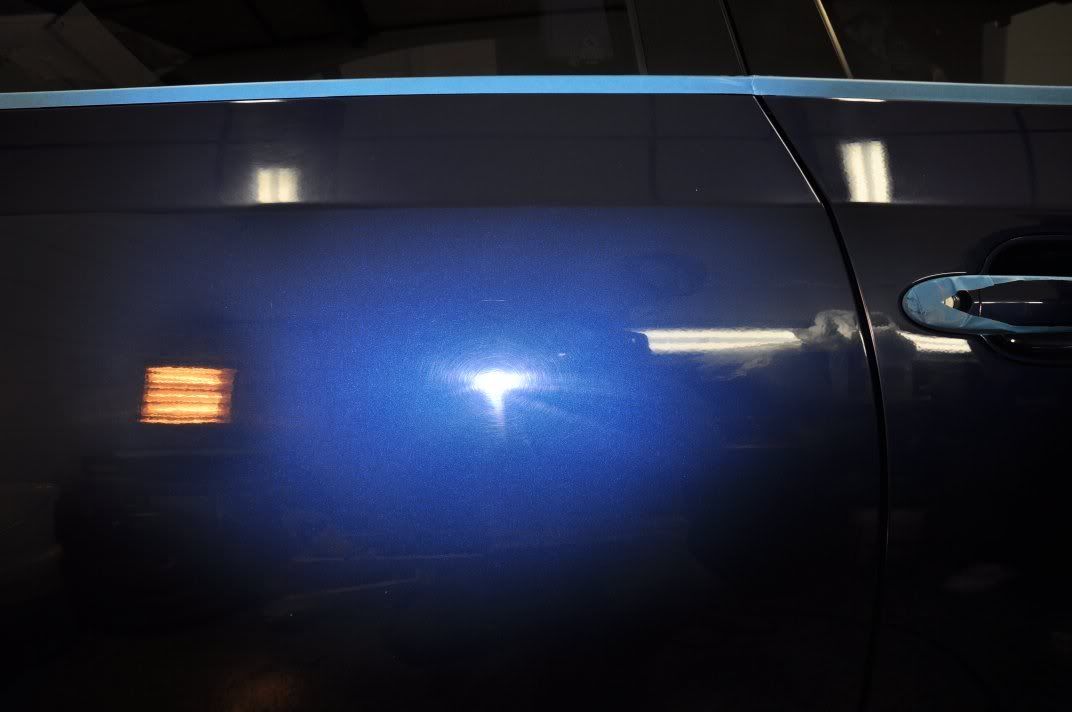
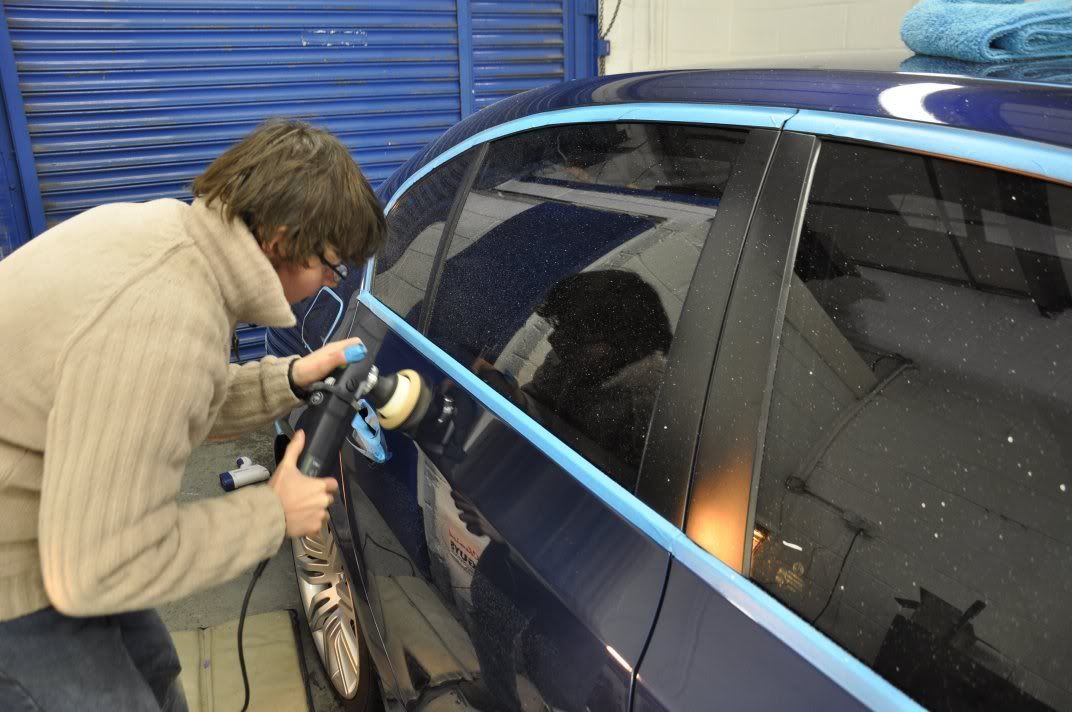
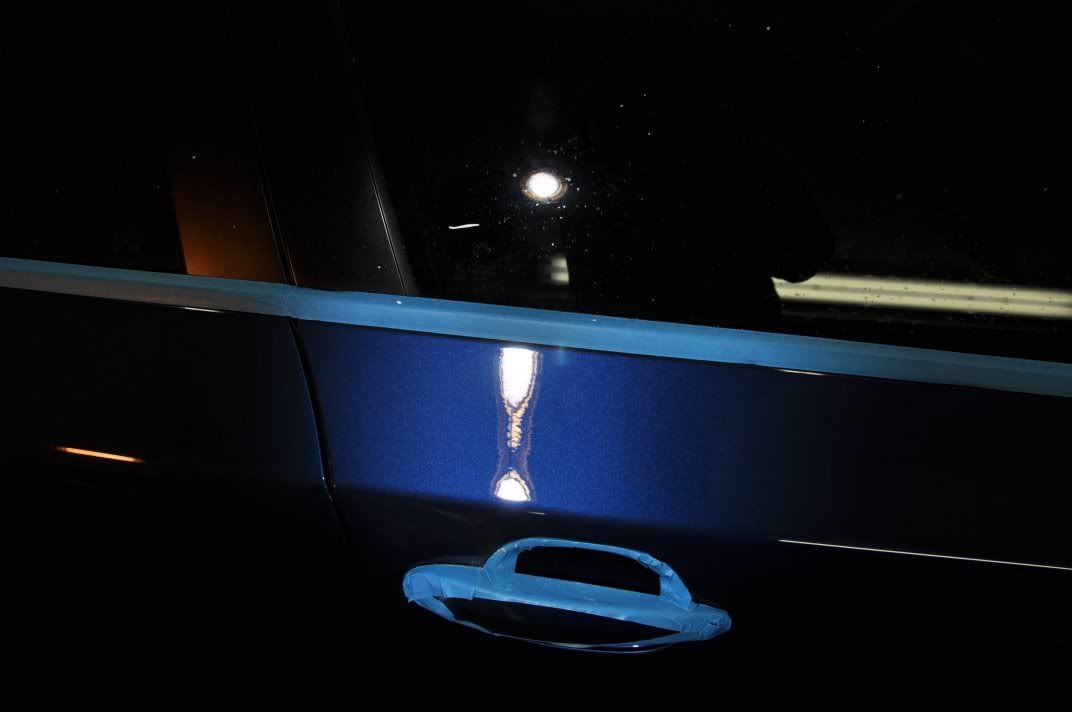
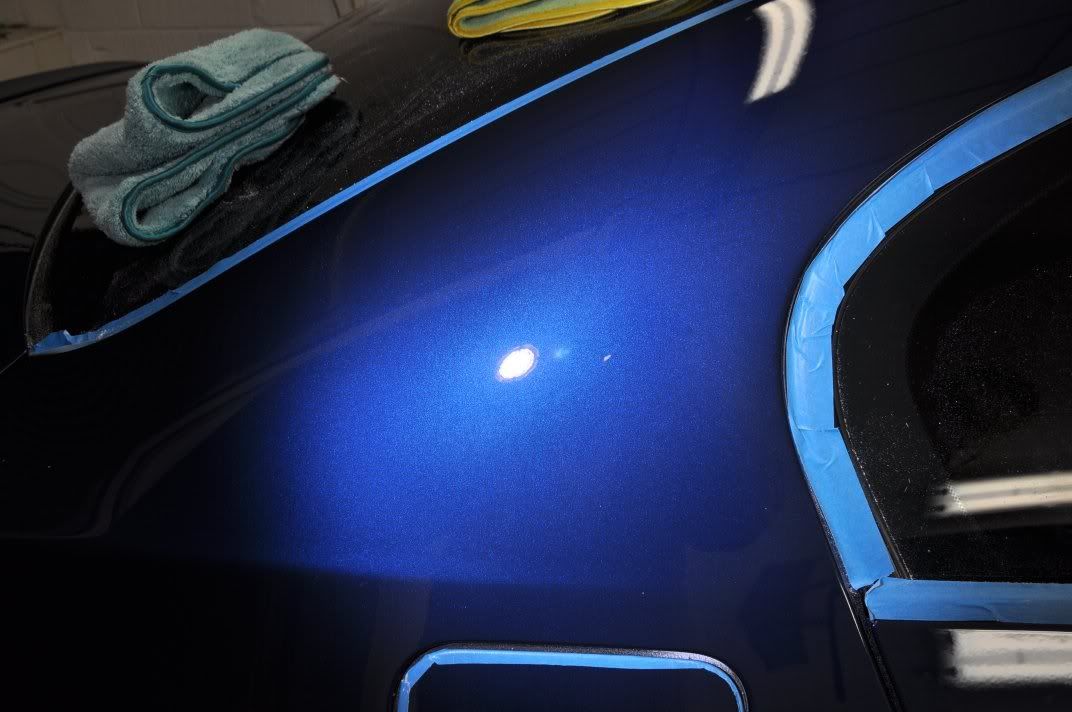
One of the good things about working in a team is that throughout the detail, Gordon and I fall into working on our own sections of the car and its pretty much the same every detail! I kick off on the bonnet and head down driver's side, Gordon starts on passenger side and heads round onto the boot... Kicking off on the bonnet, we can see where the previous machine polishing efforts had been taking place...
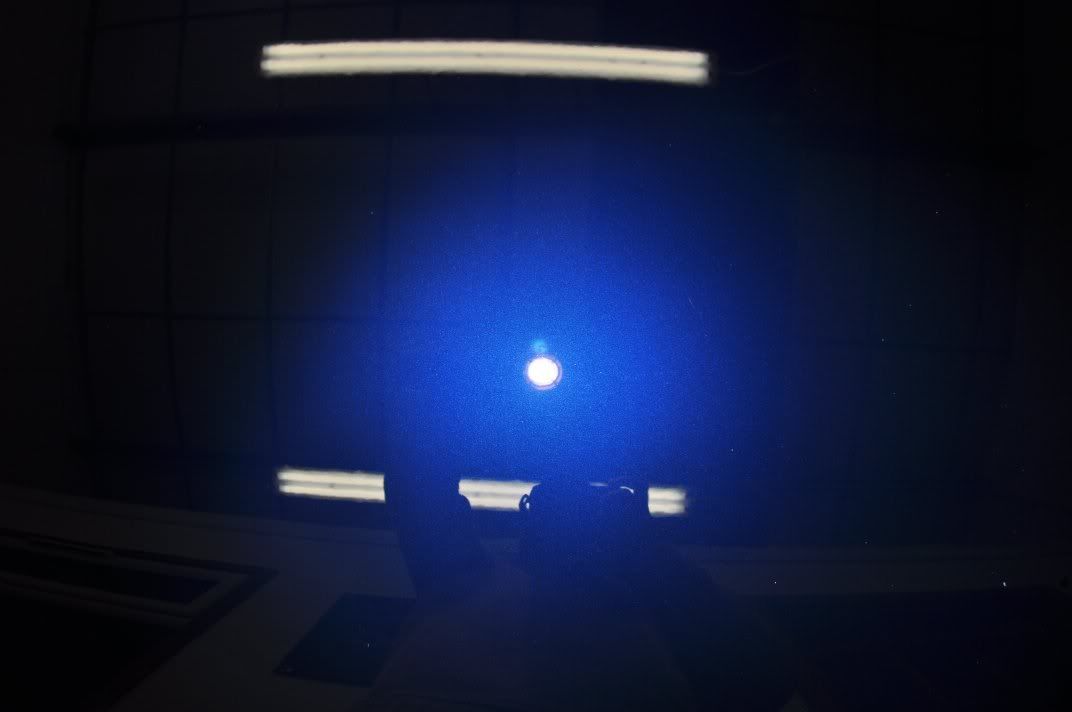
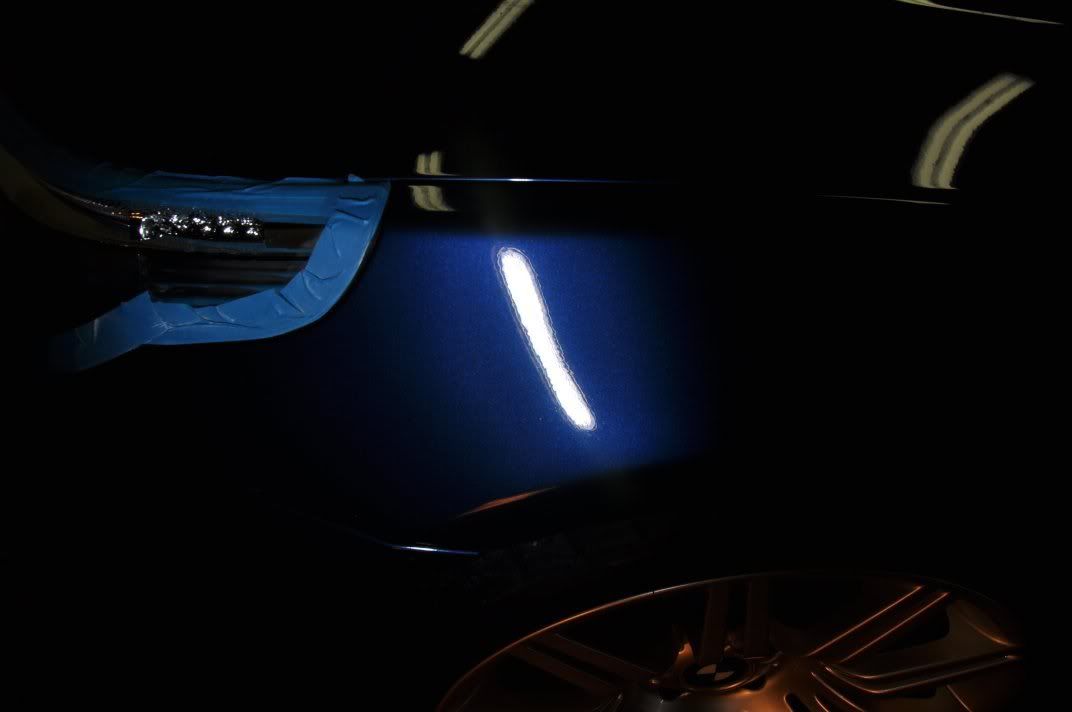
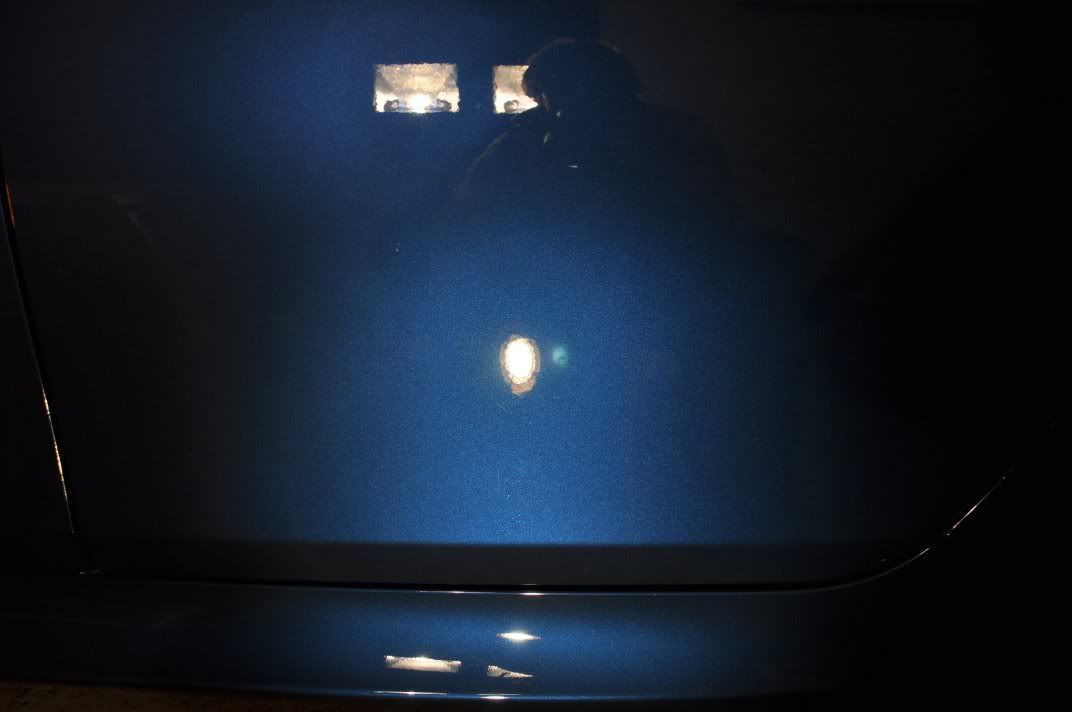
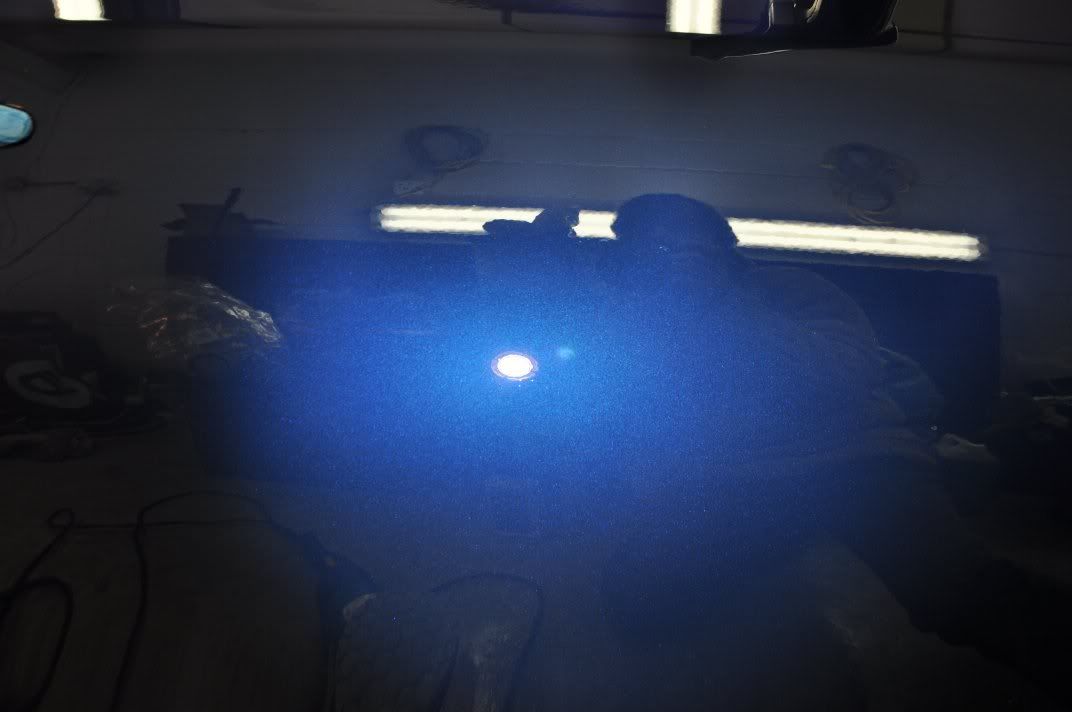
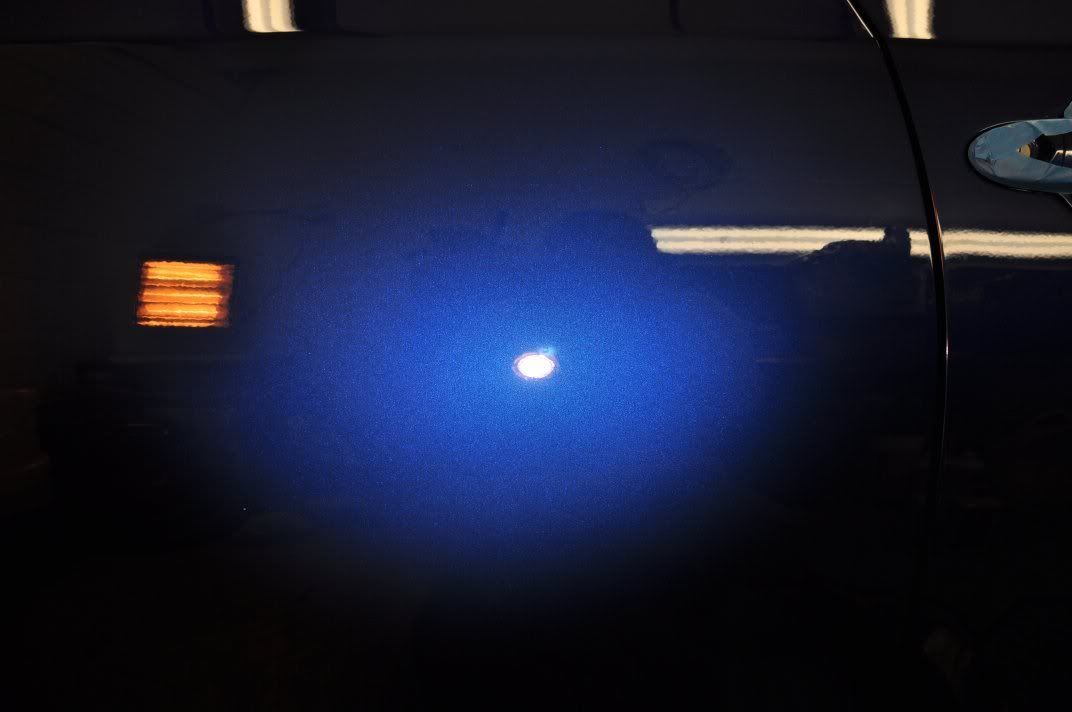
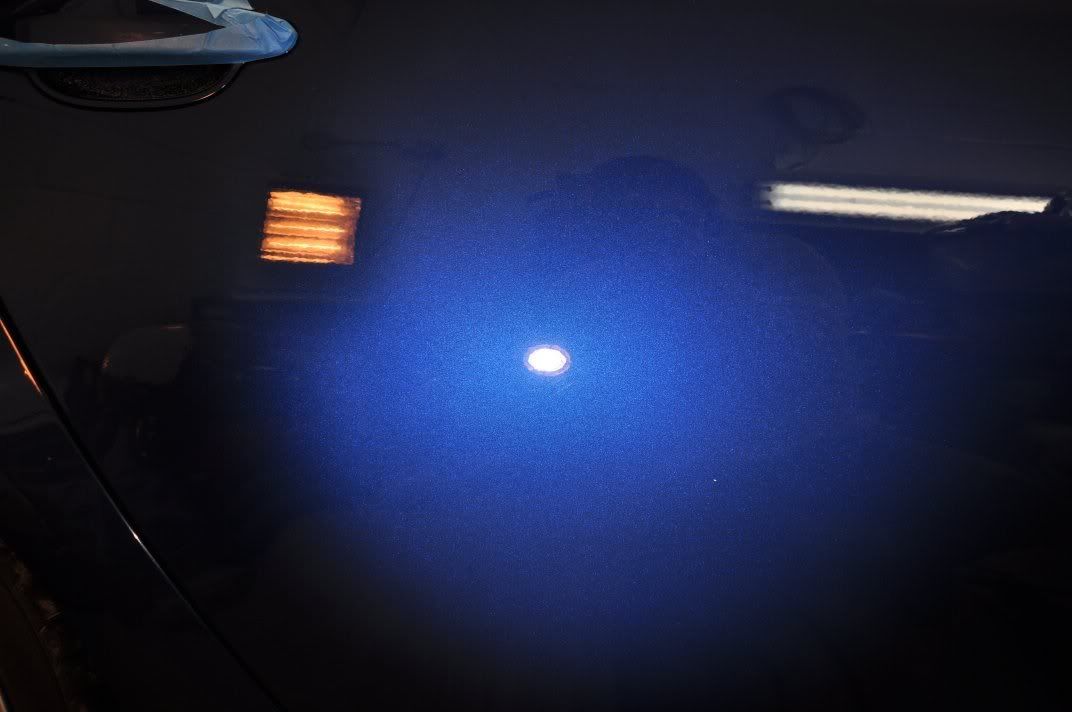
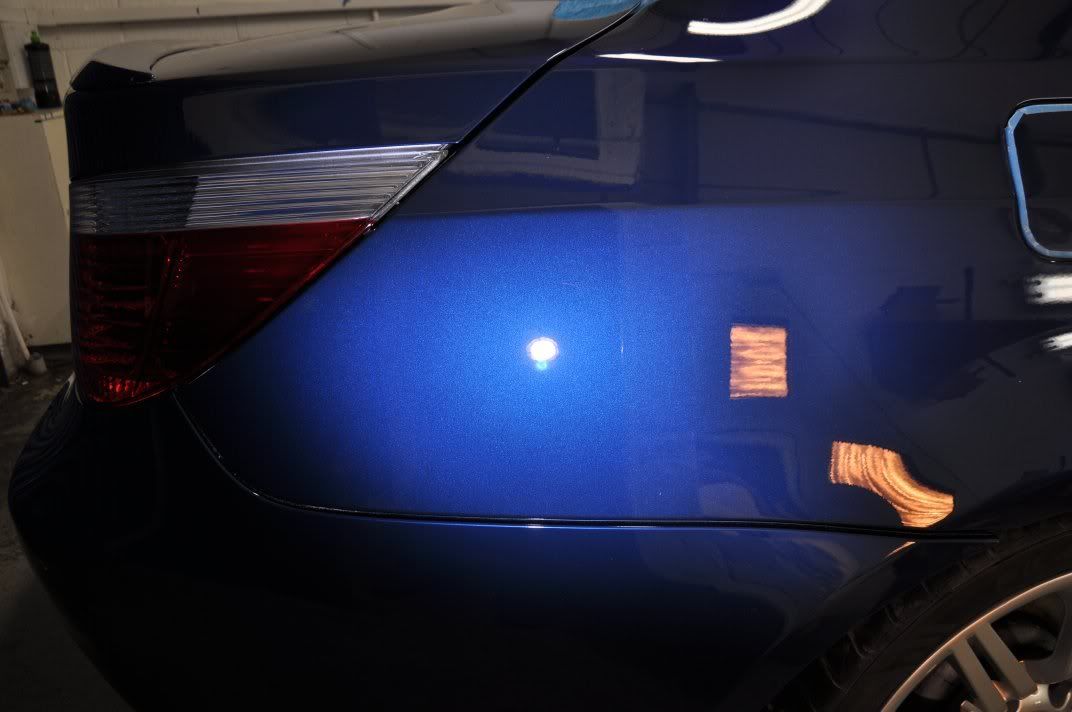
Gordon started off on the passenger side, and the hologramming was pretty bad round there too...
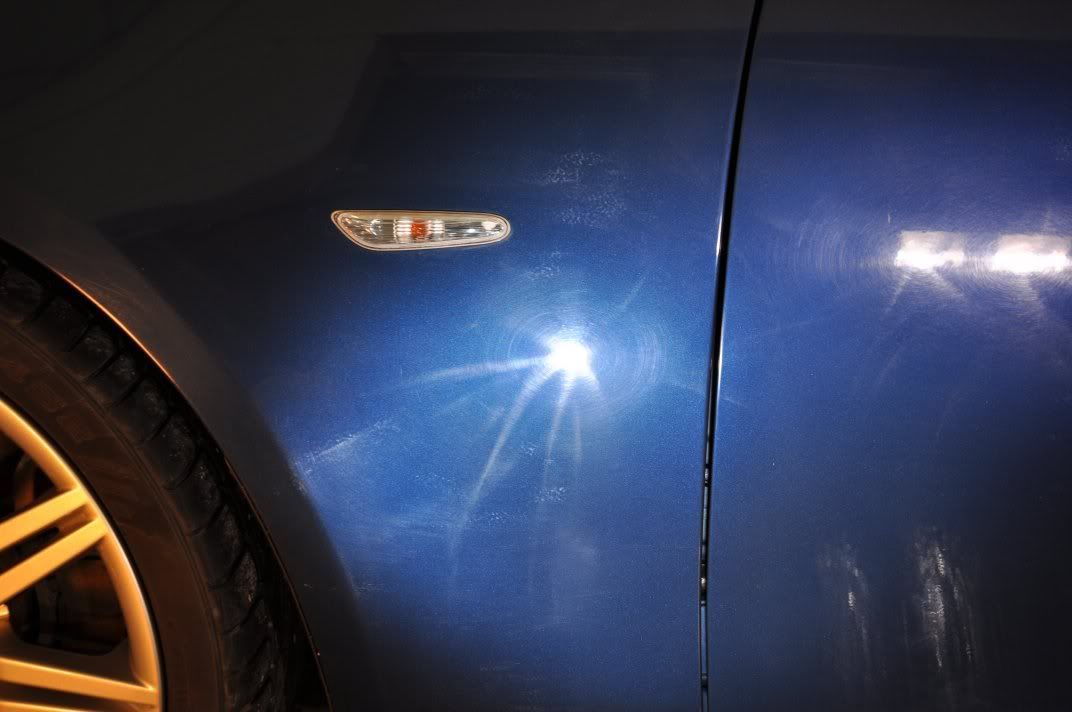
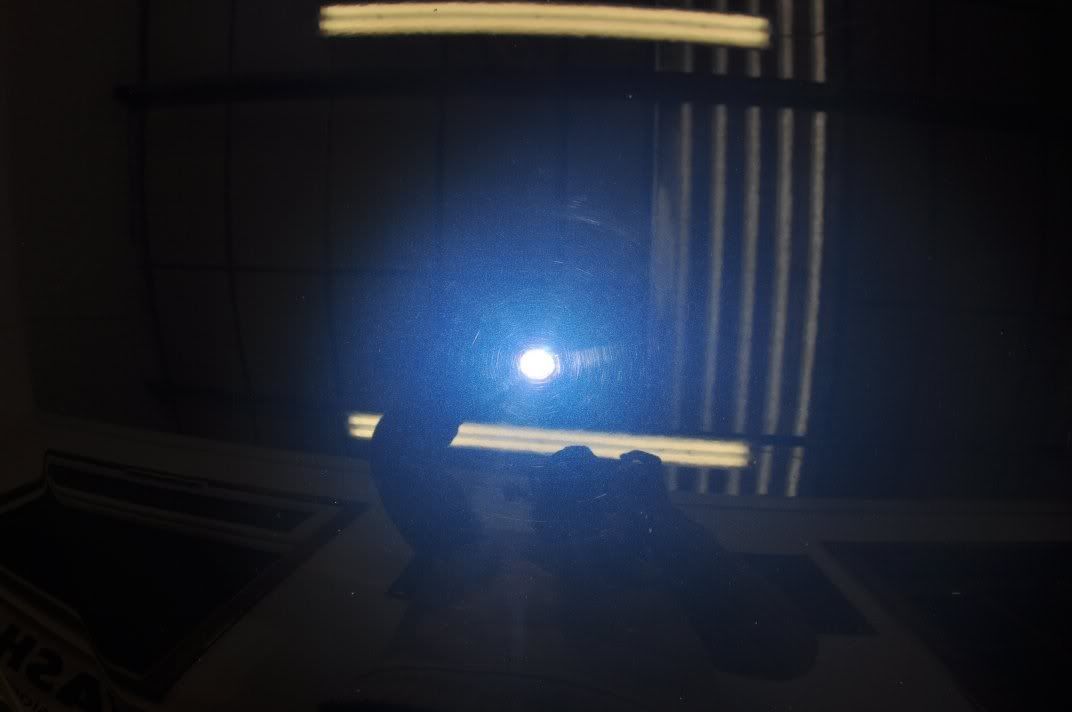
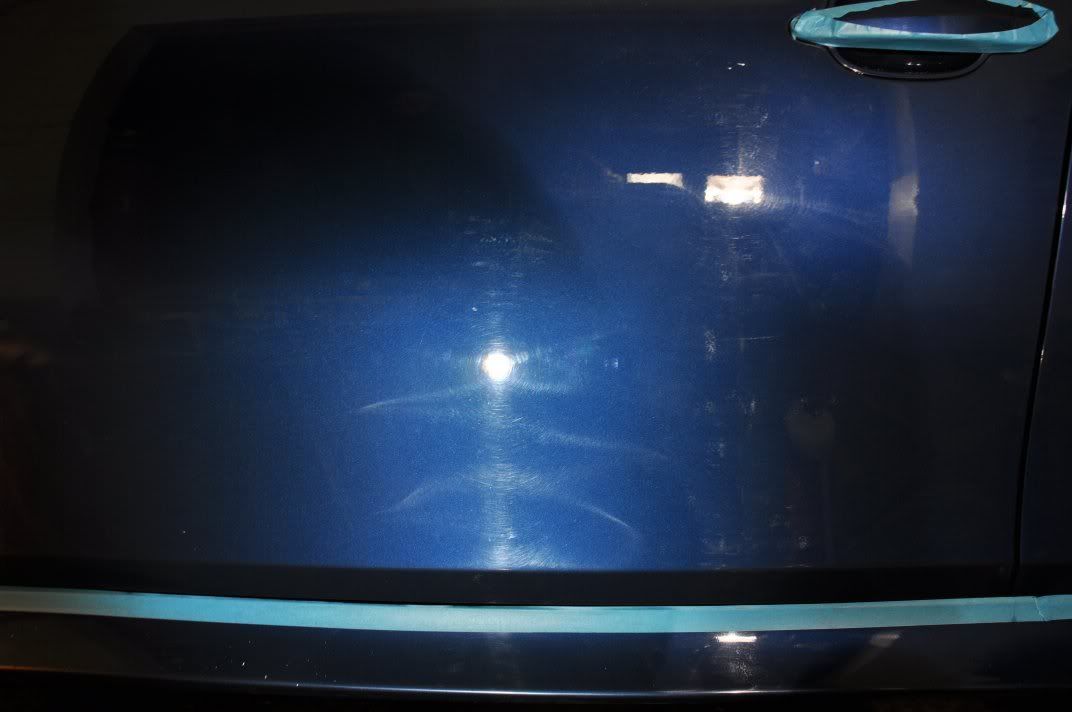
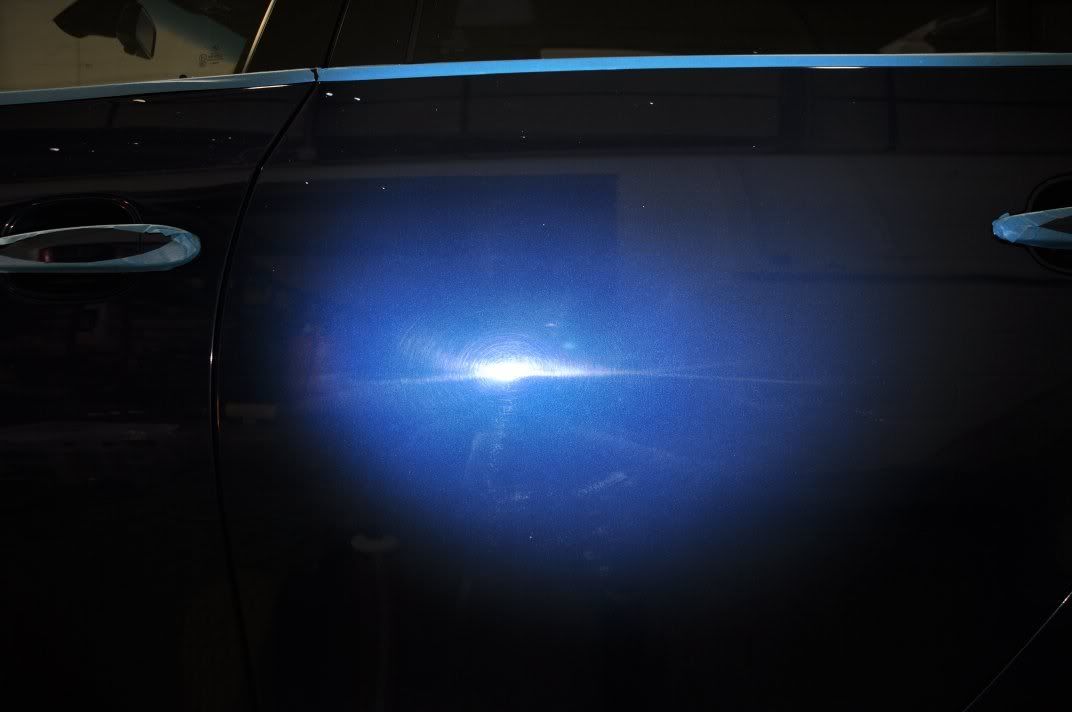
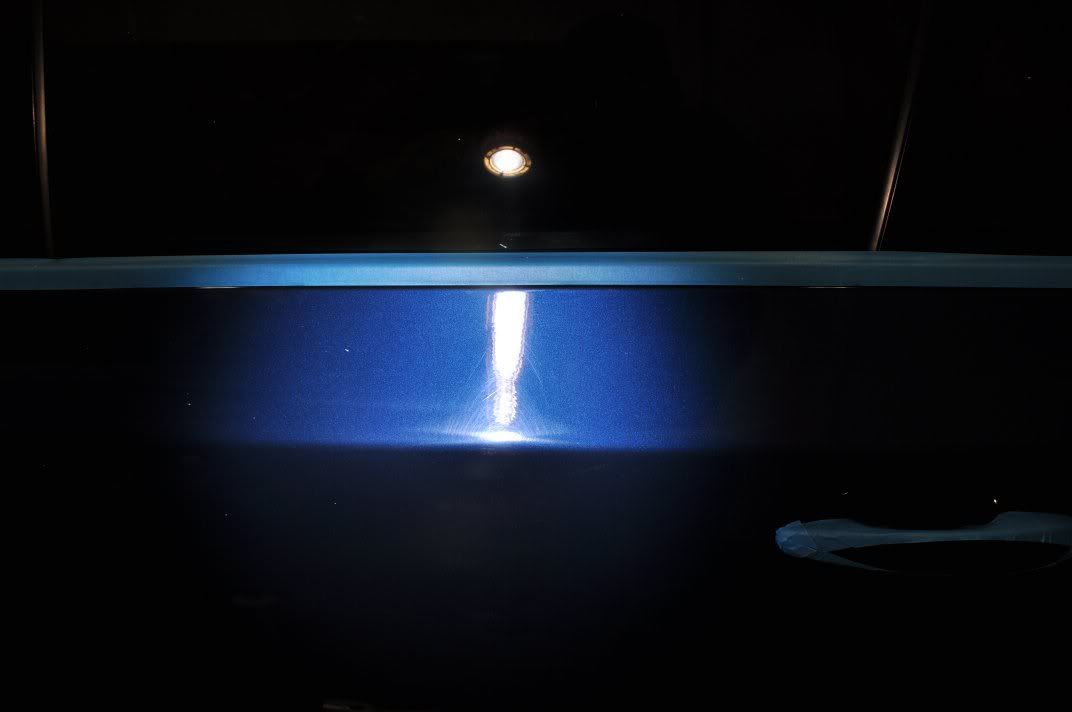
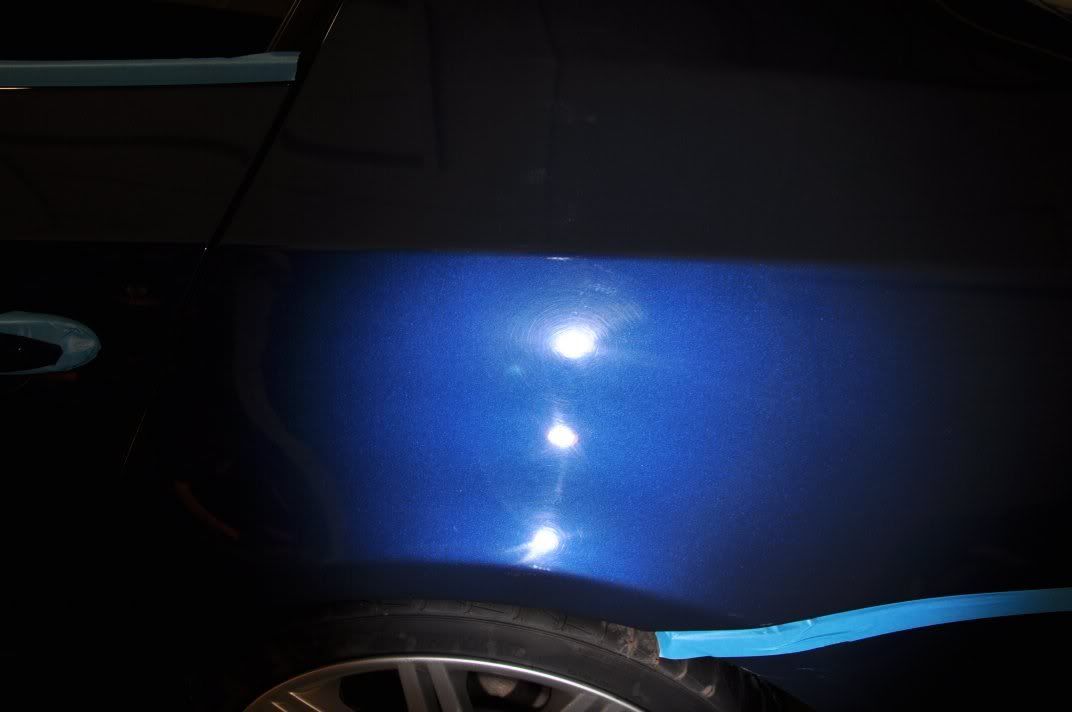
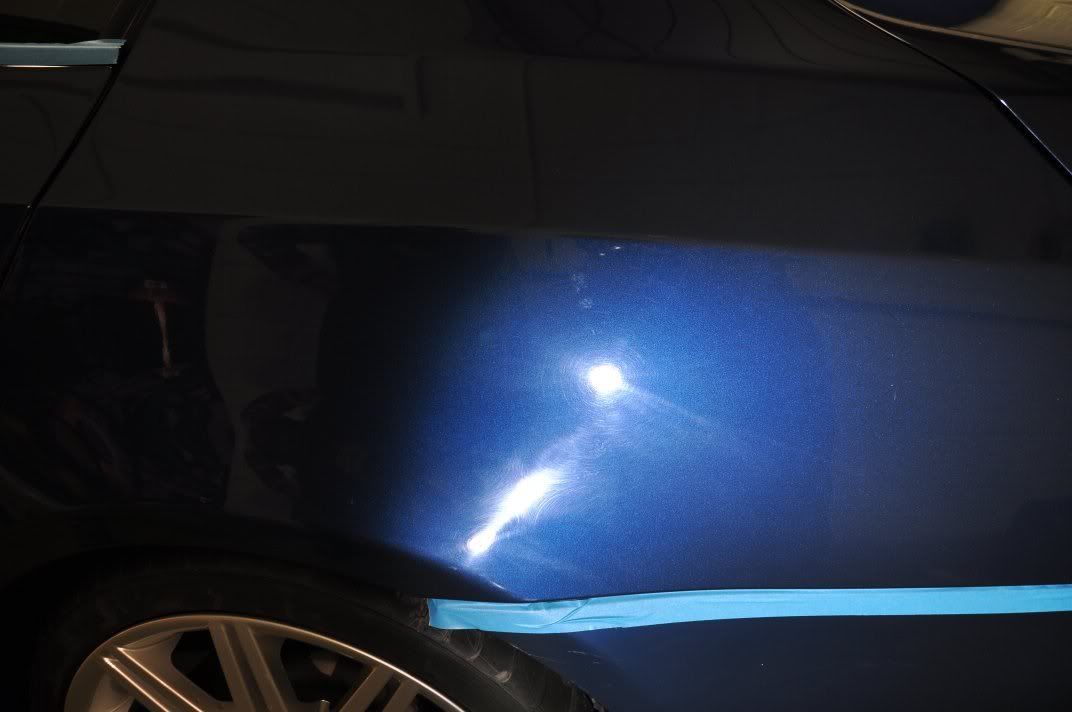
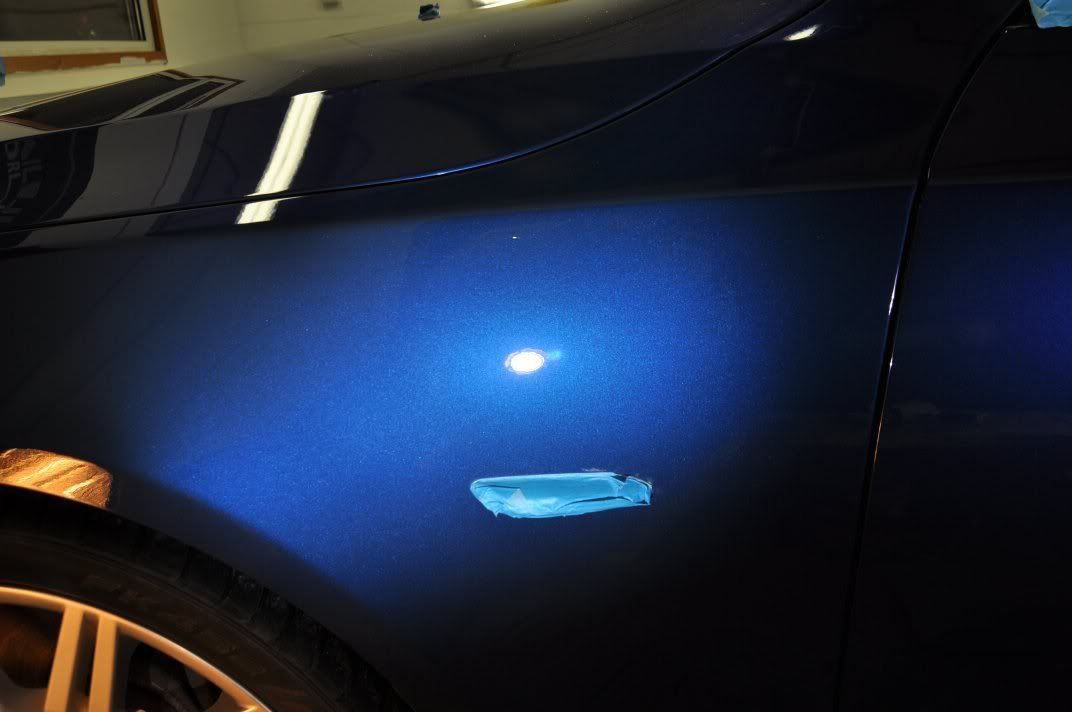
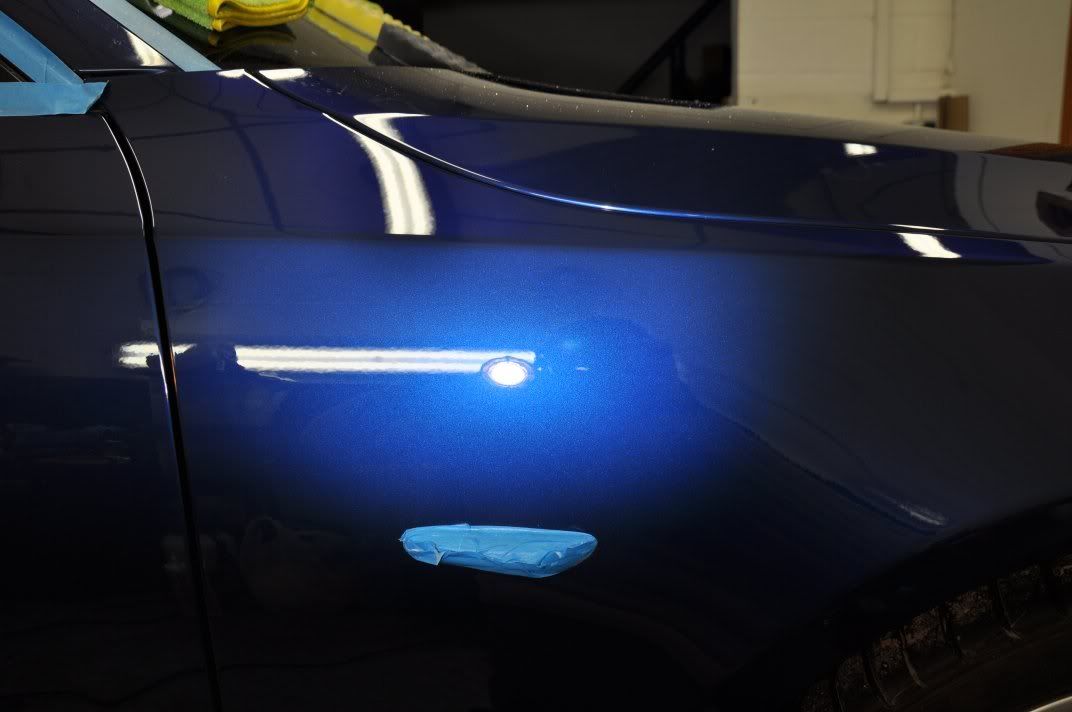
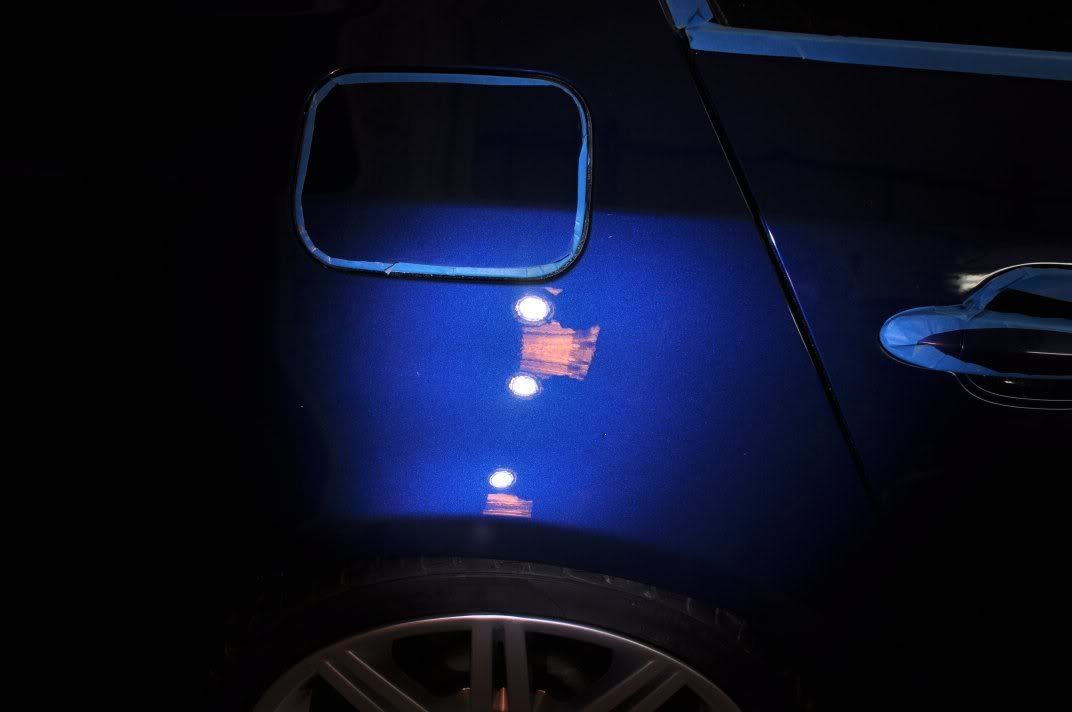
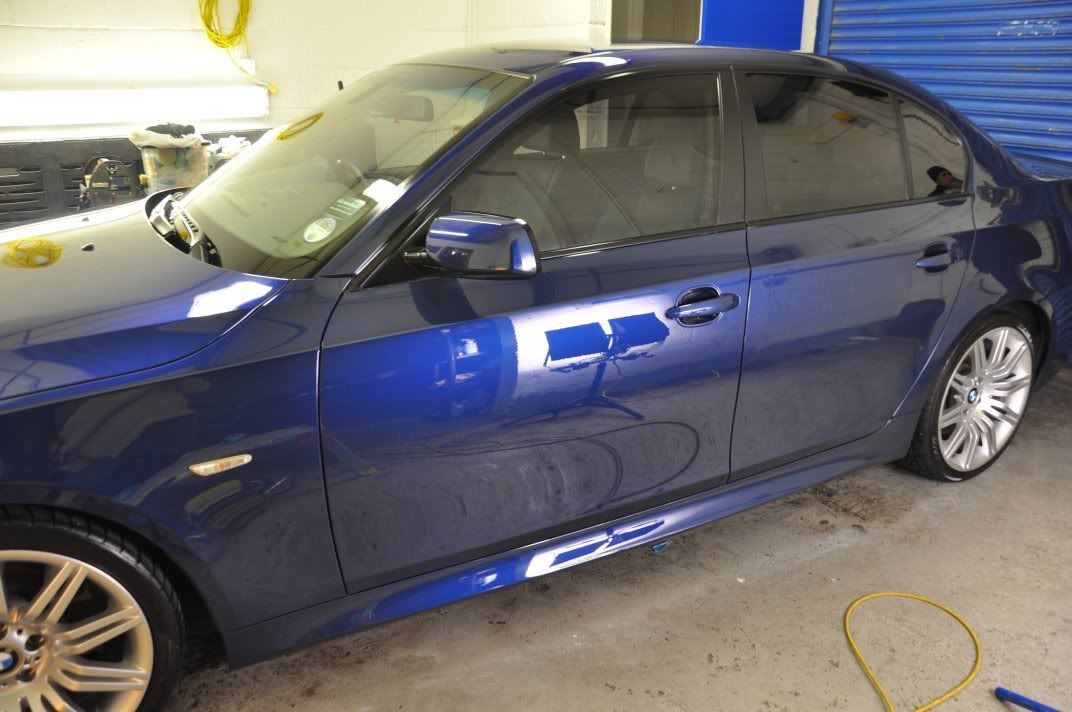
Looking further down the passenger side it was evident this whole car had been machine polished already, with moderate to severe hologramming across the board. Worse were regions where it appeared the buffing mop/pad had picked up grit and had left deep circular pigtail like RDS which were going to proove much tougher to remove. More befores from passenger side...

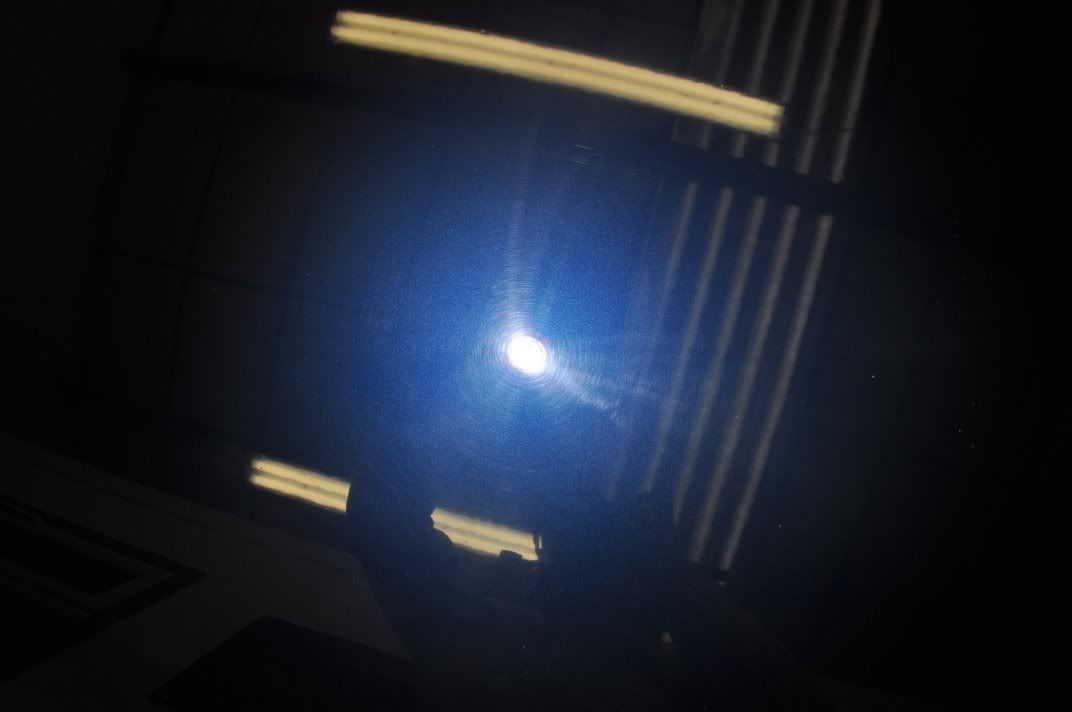
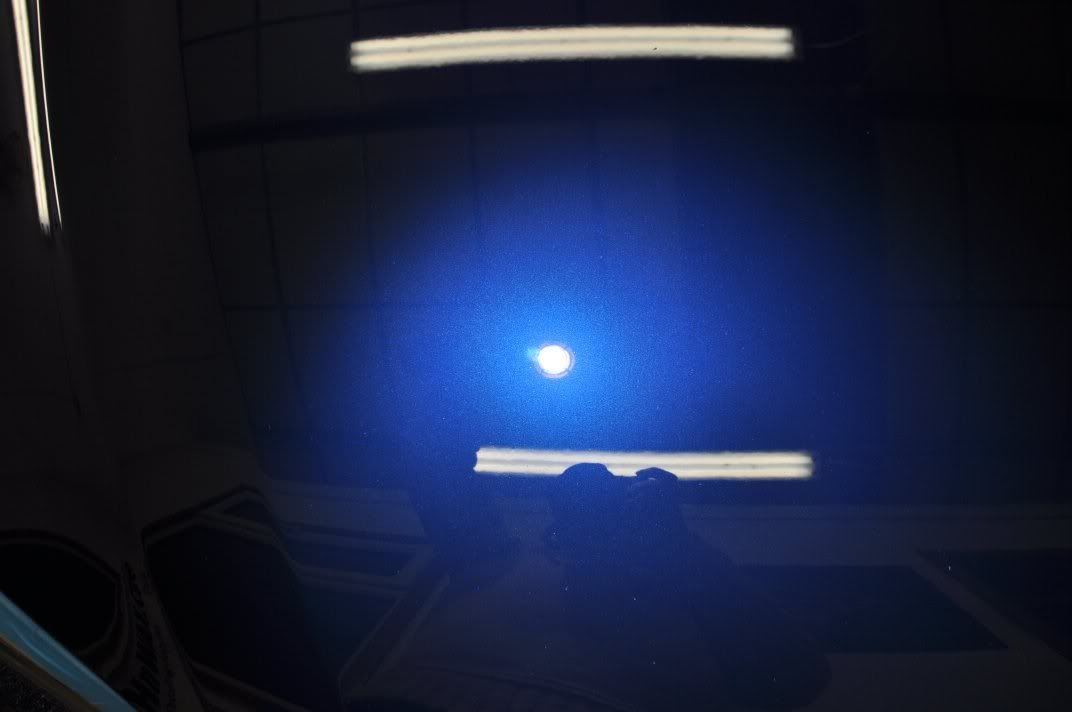
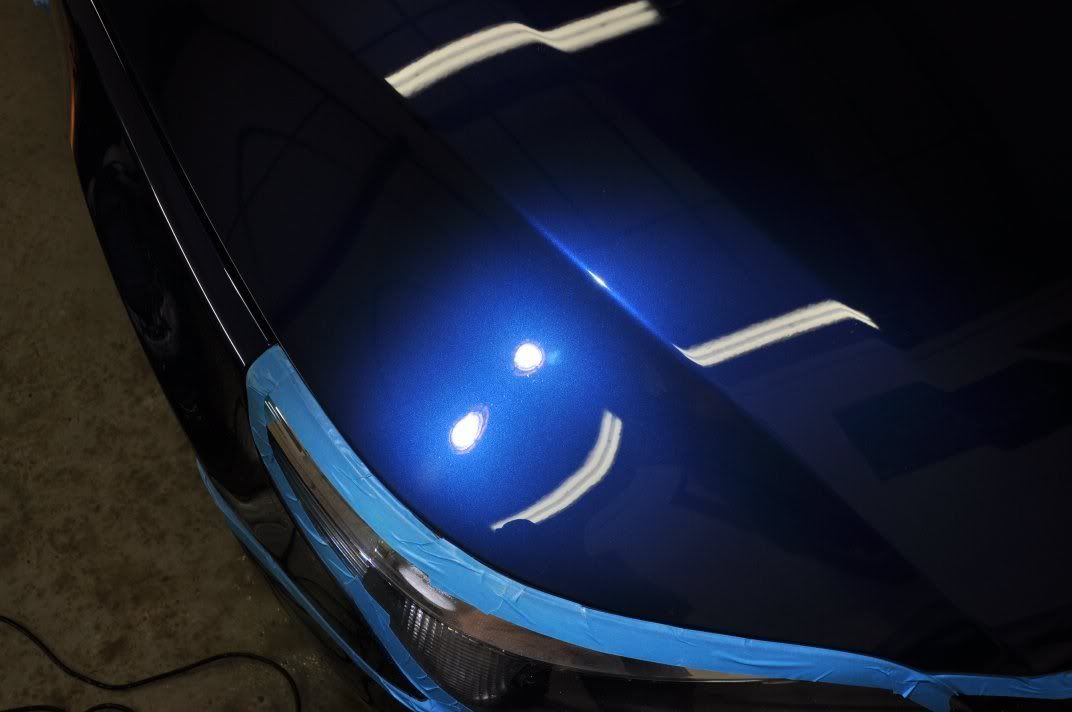
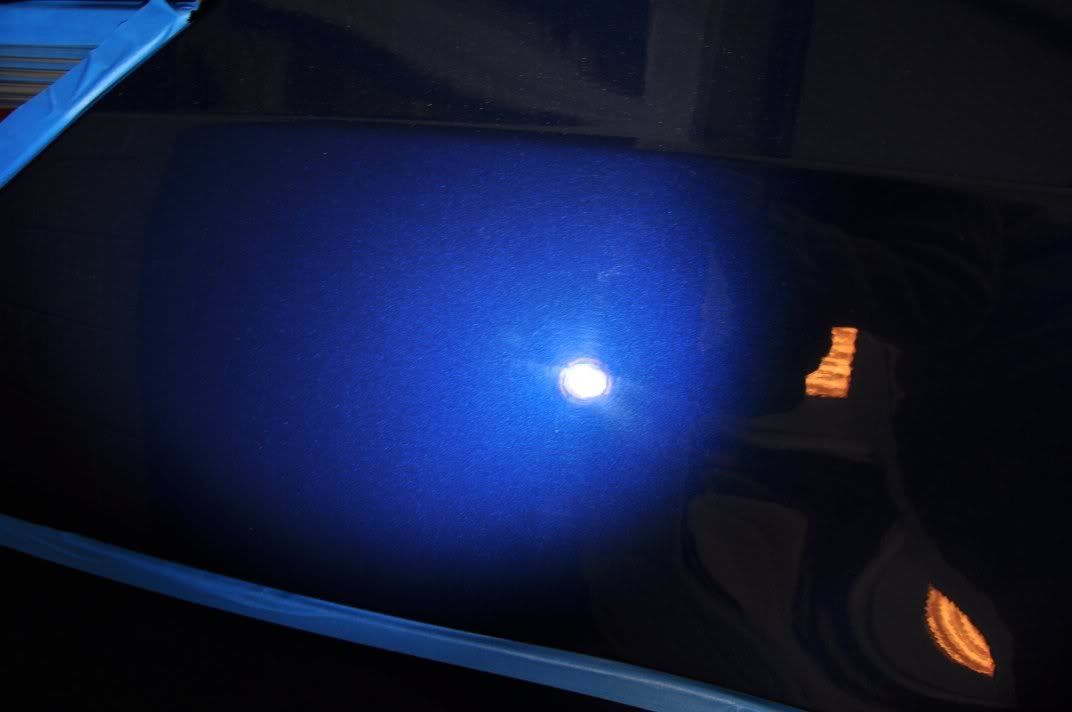
The end result of this (and a good three hours behind the rotary!) on the bonnet was:
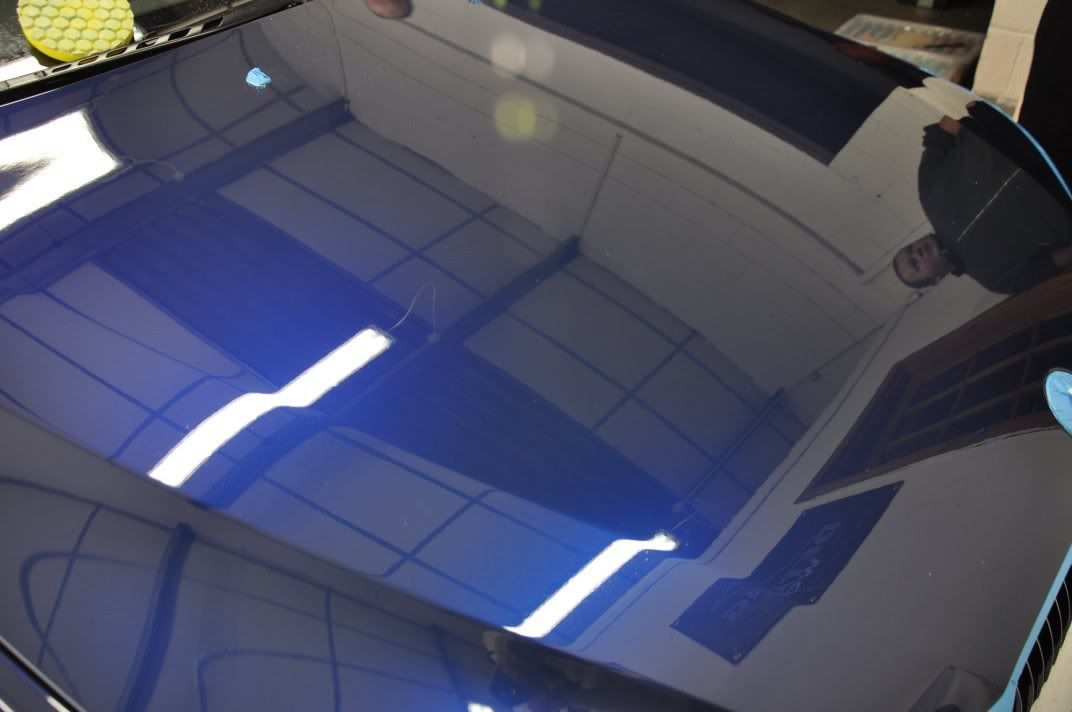
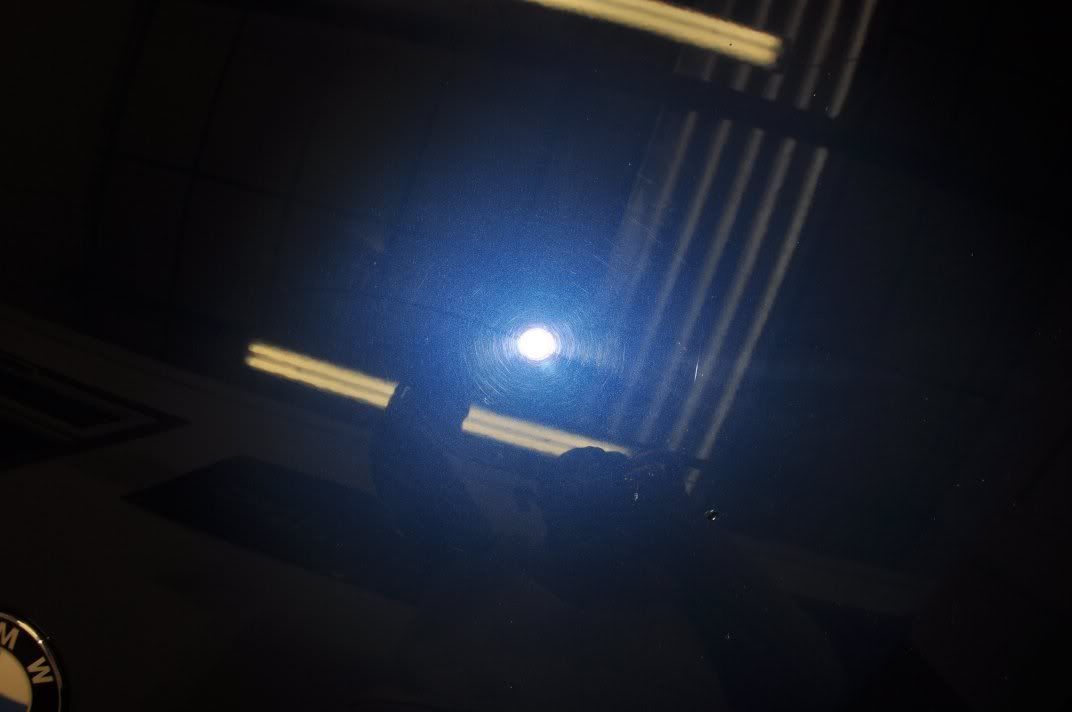
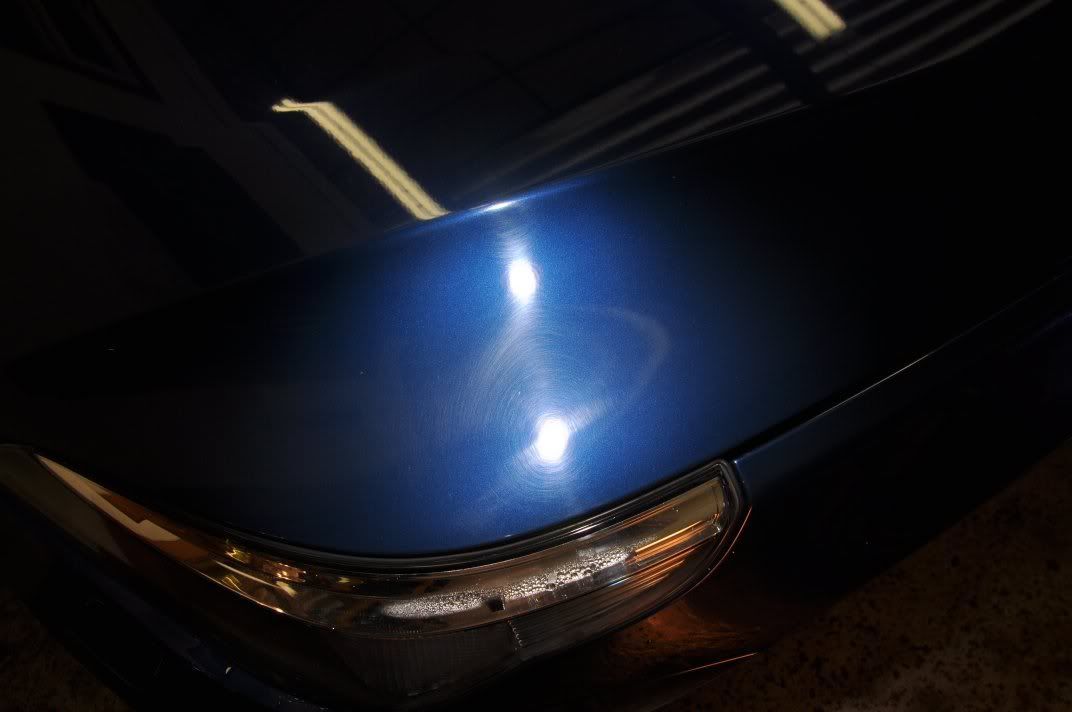
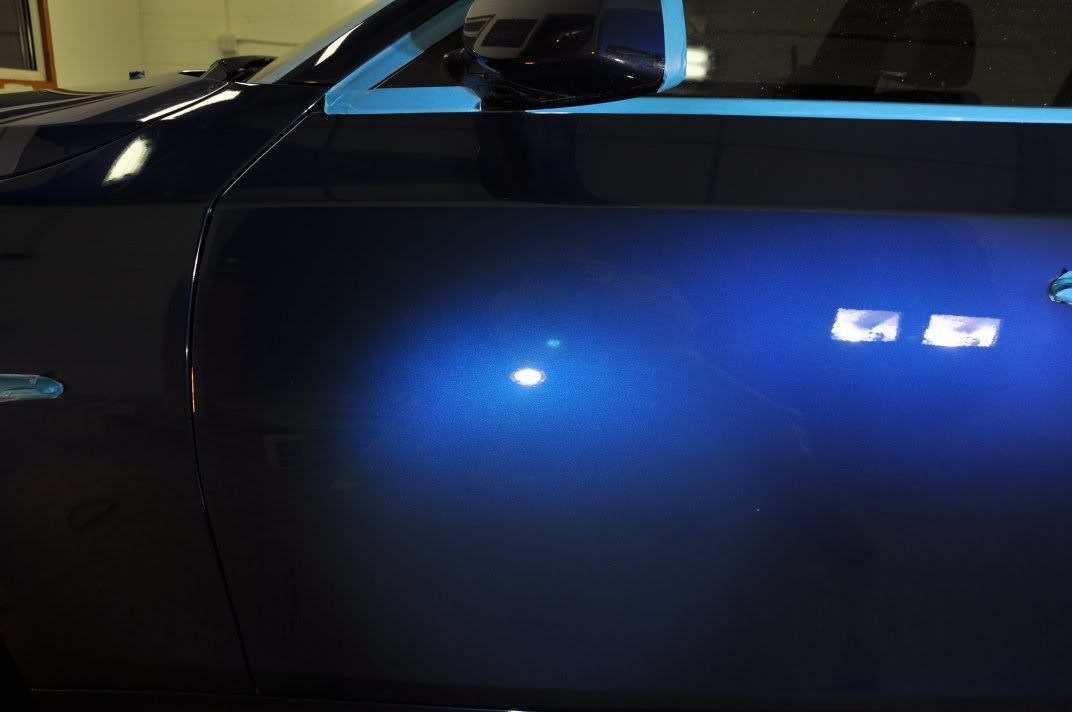
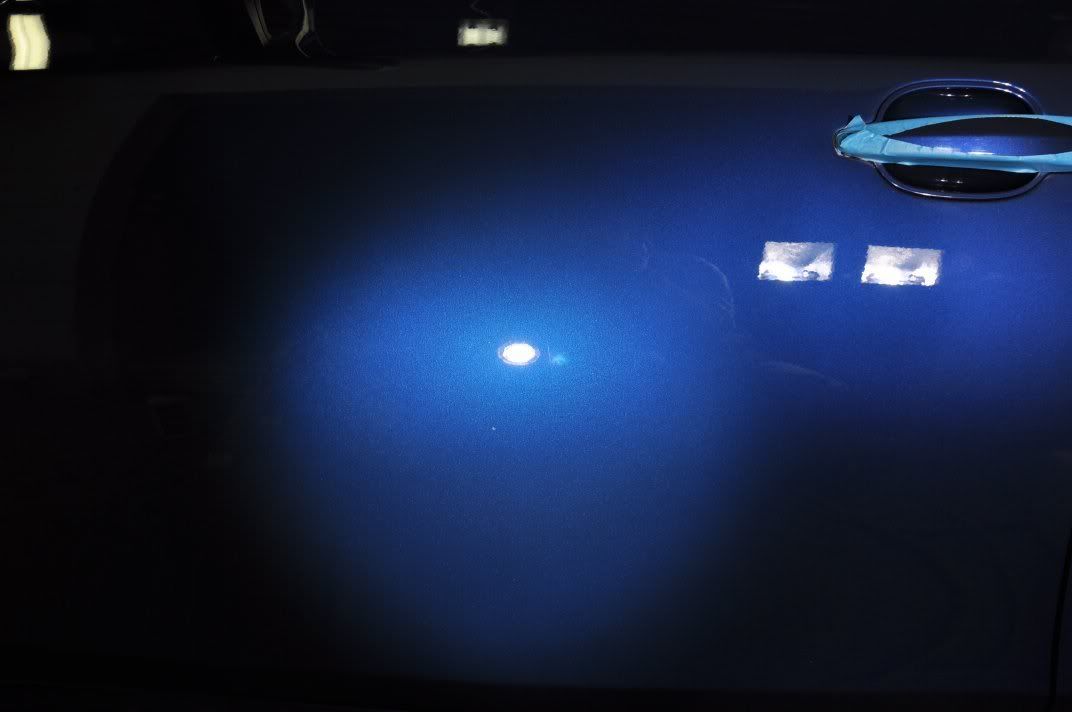
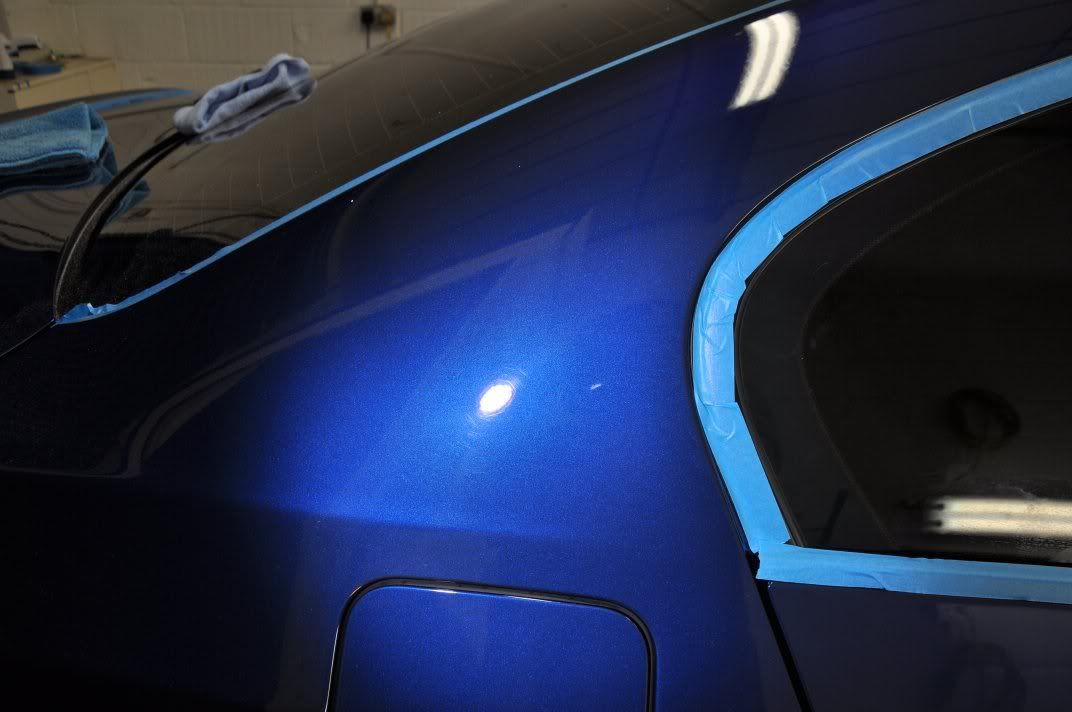
Checked for finish quality under the Sun Gun - no holograms here :
:
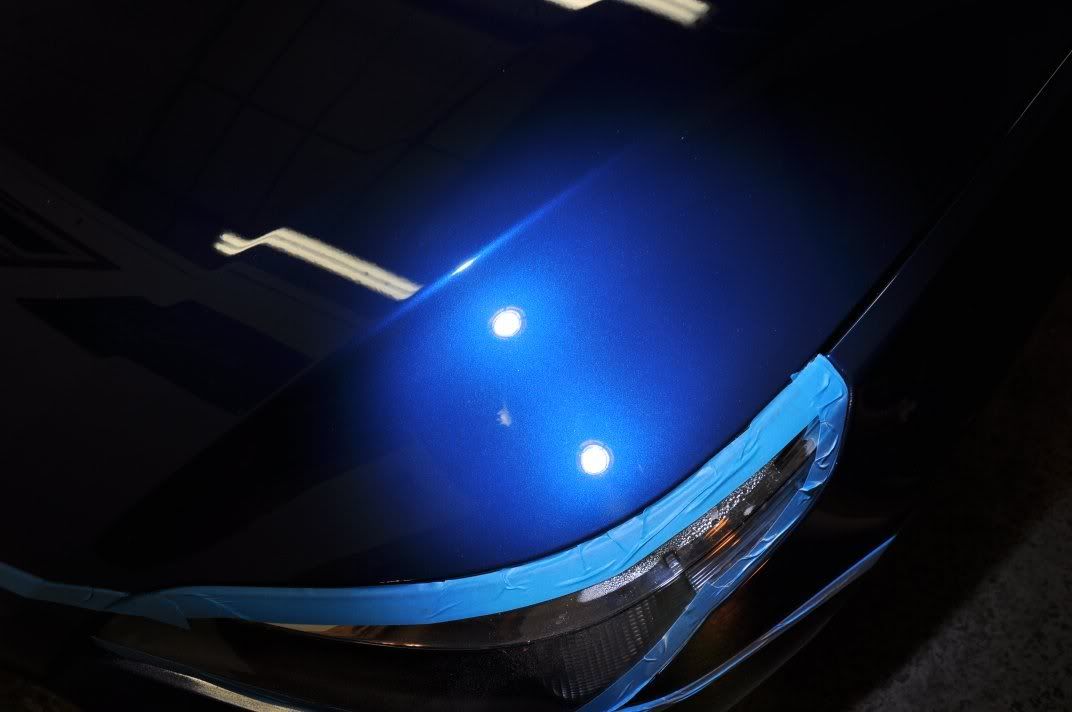
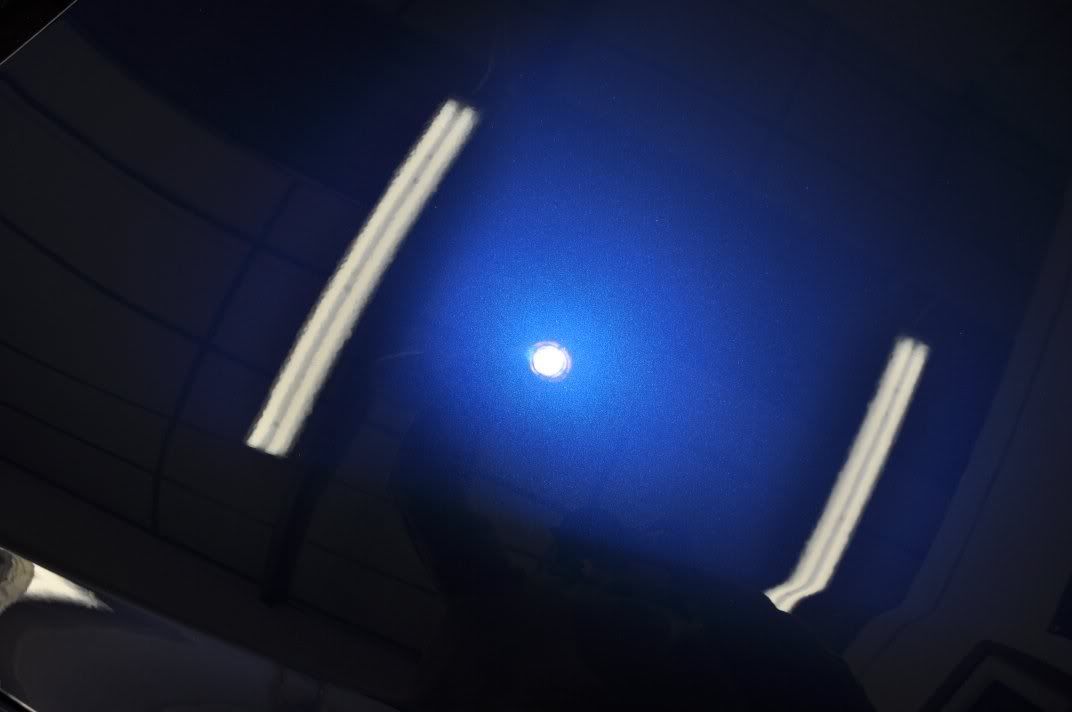
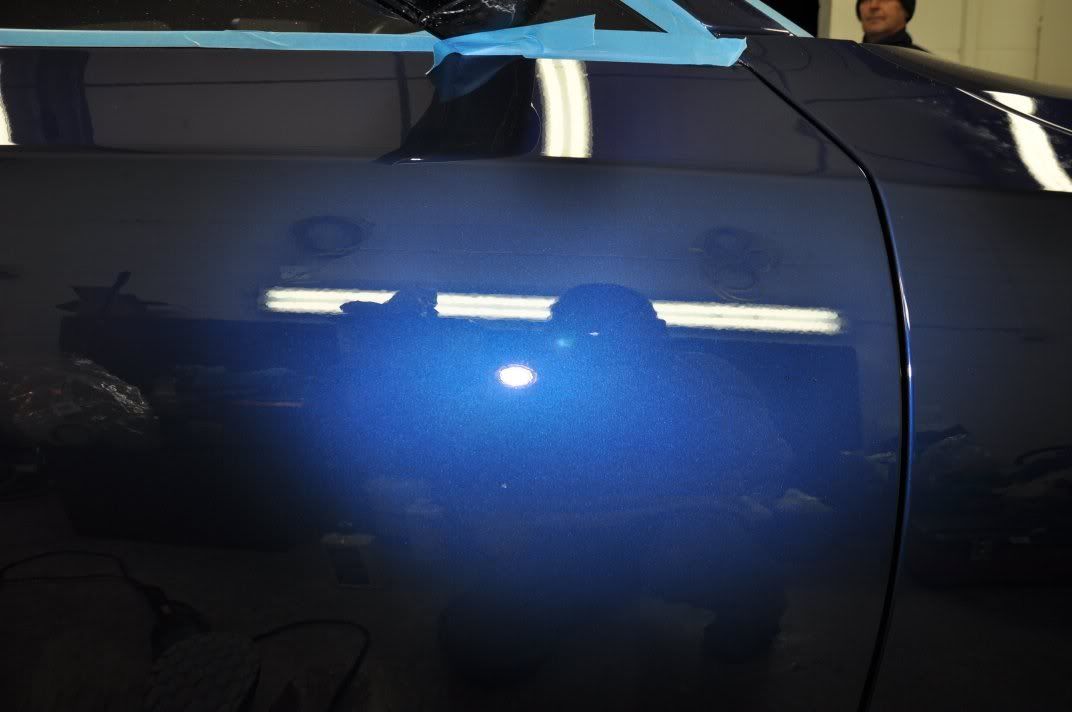
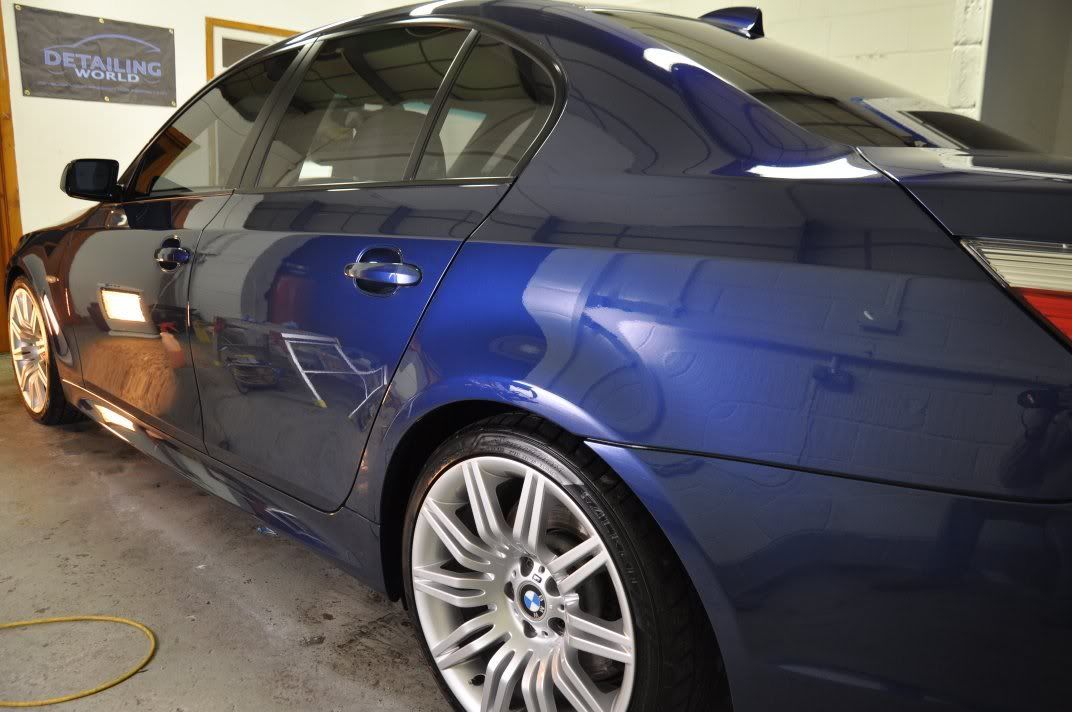
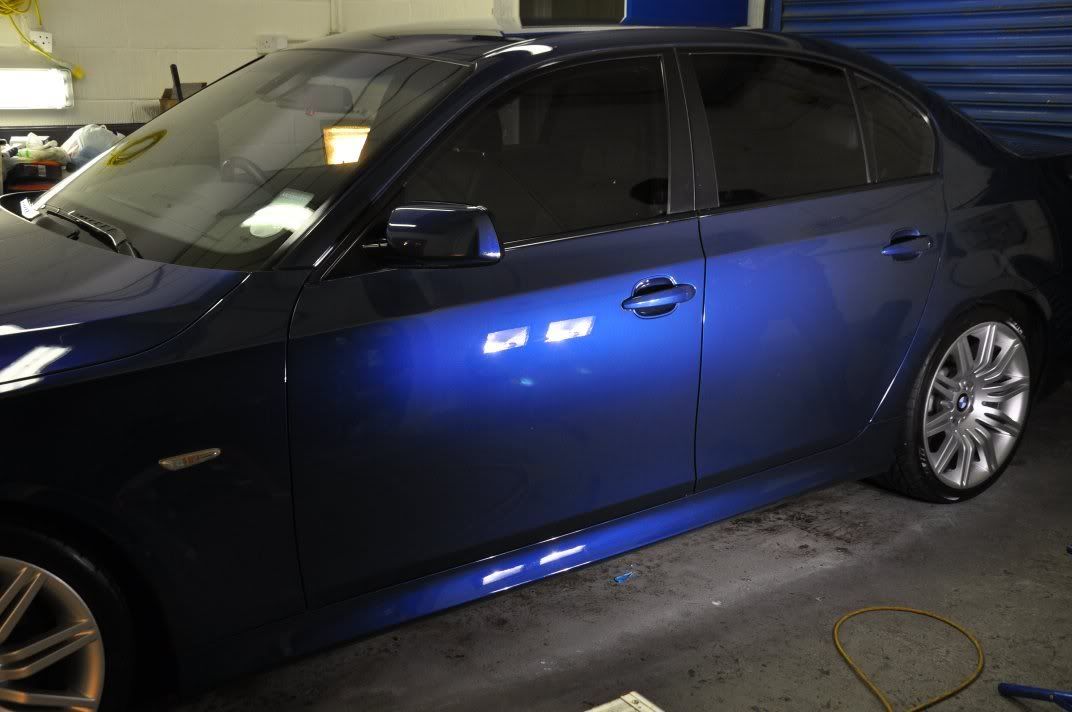
With the hologramming and marring removed, a new depth had been restored to the finish and the colour turned out to be a really lovely deep blue - one of BMW's best? I reckon so.
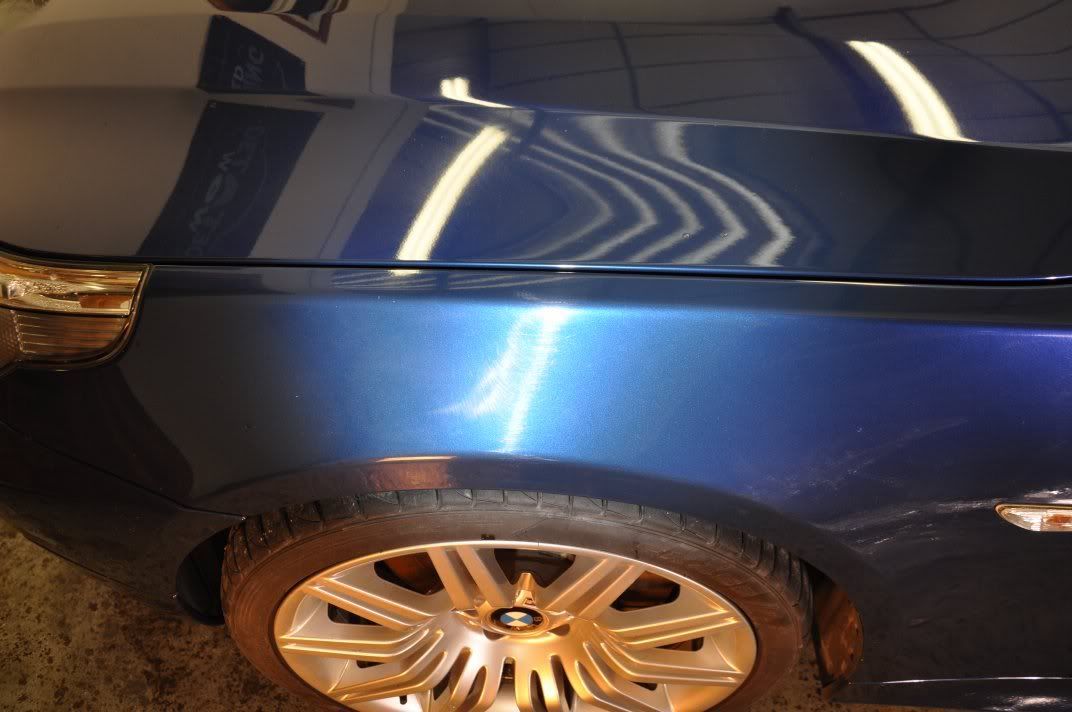
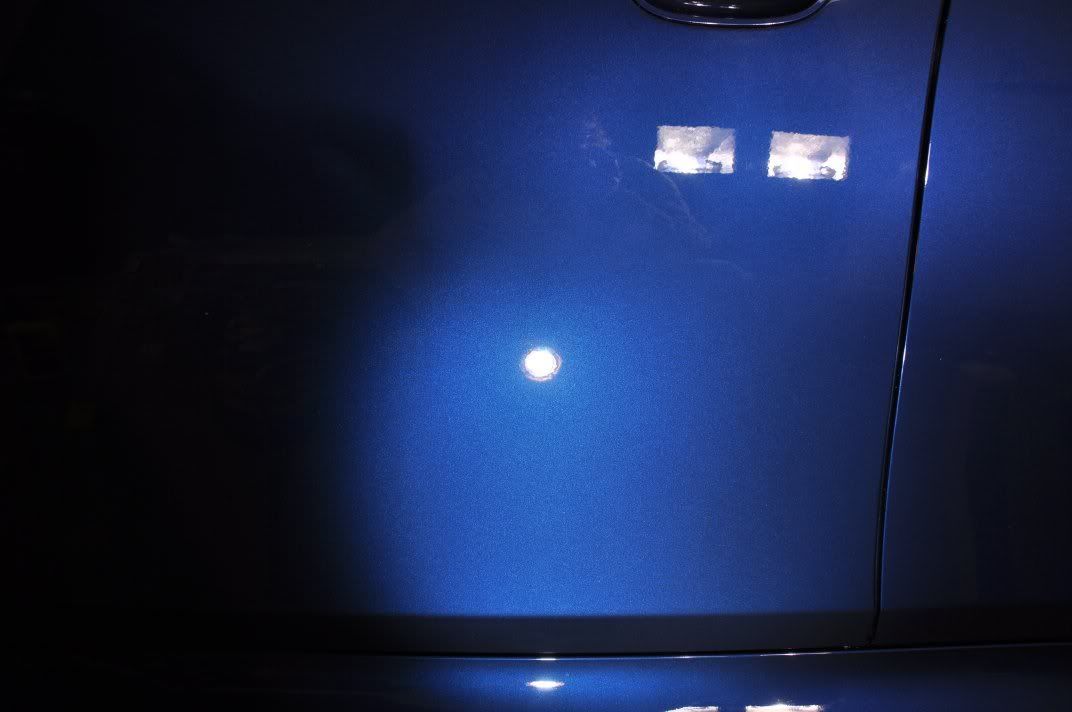
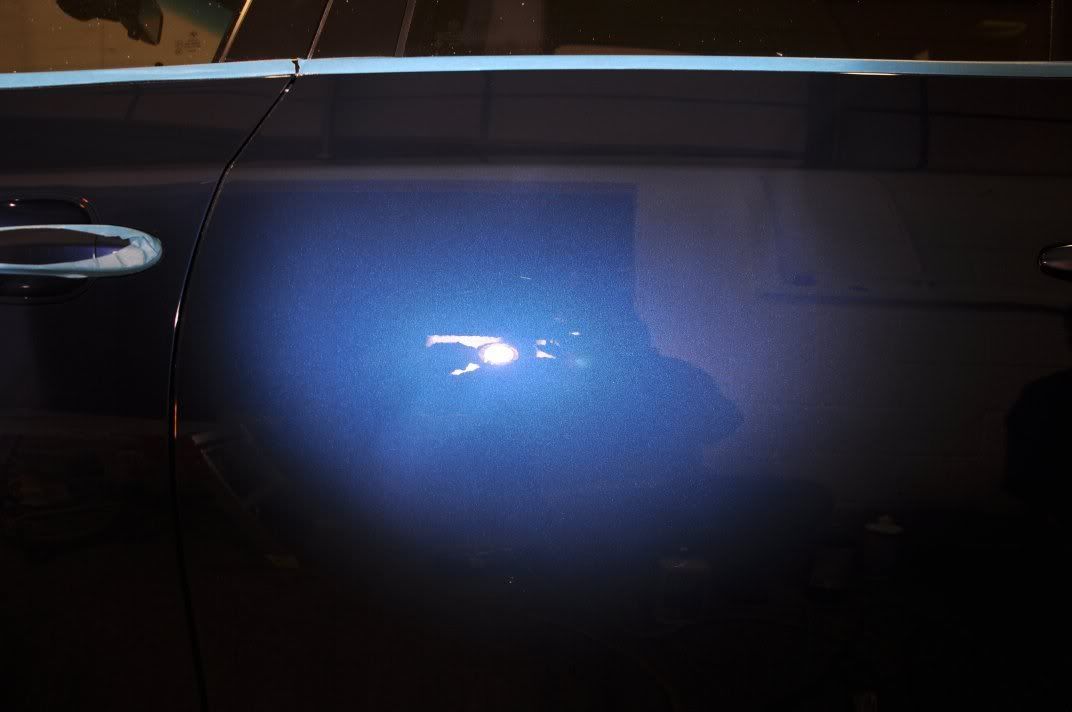
Meanwhile, round at Gordon's side, Gordon was enjoying a similar process of heavy compounding, middle polish and finishing polish as described above, turning the previosuly hologrammed and marred paint into the following...
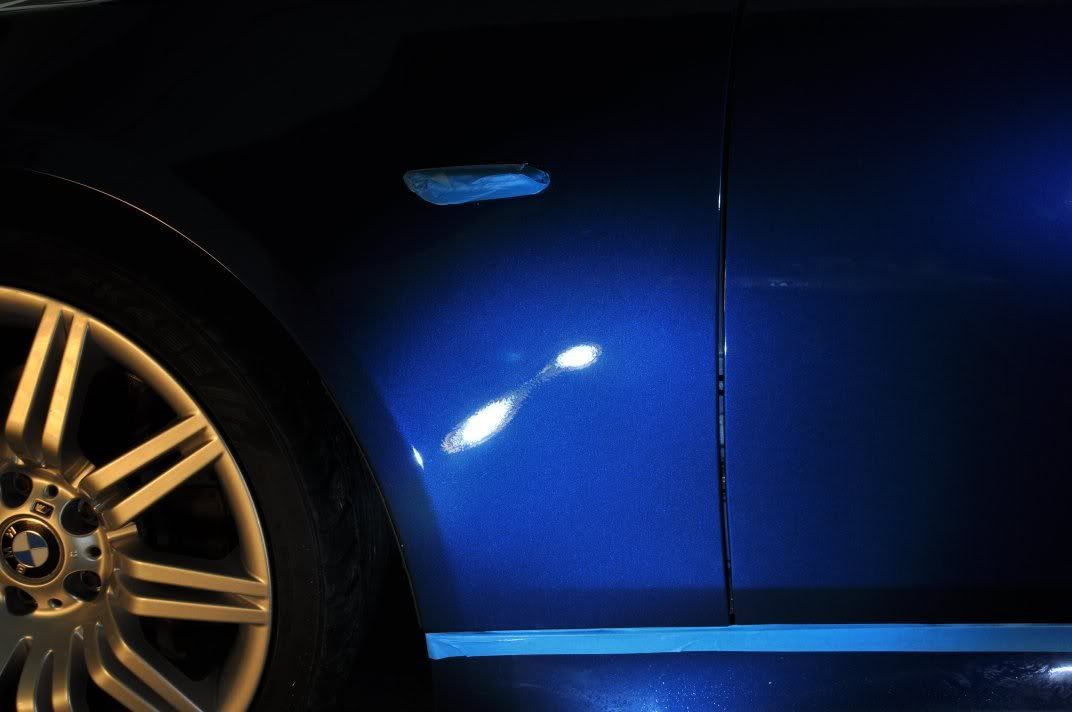

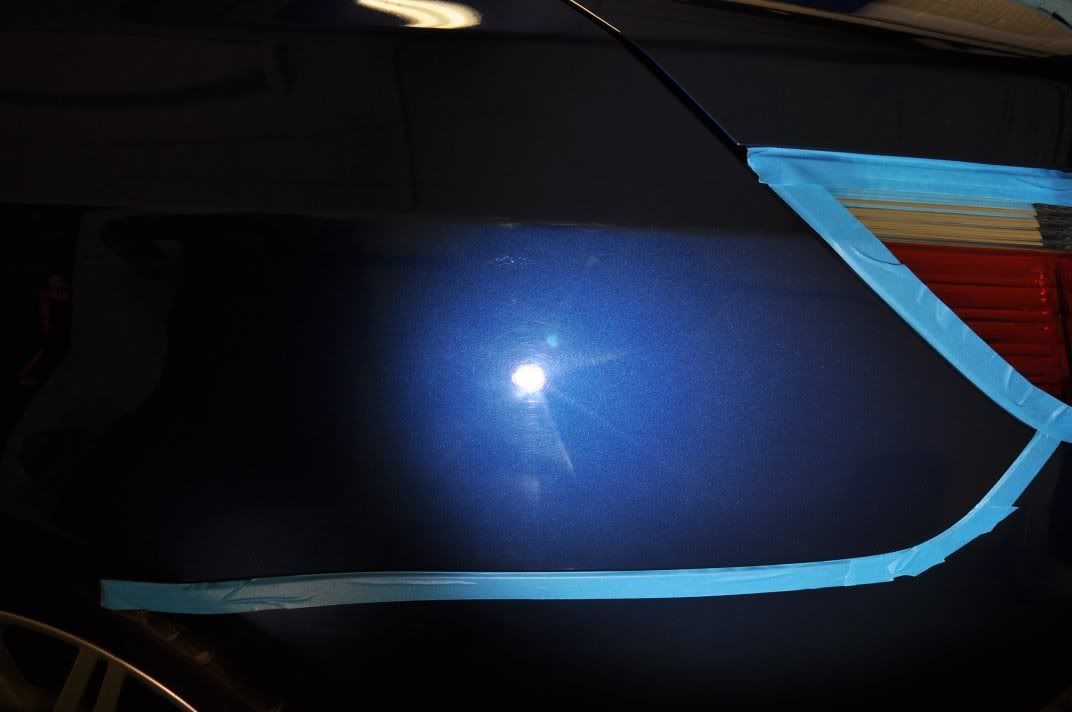
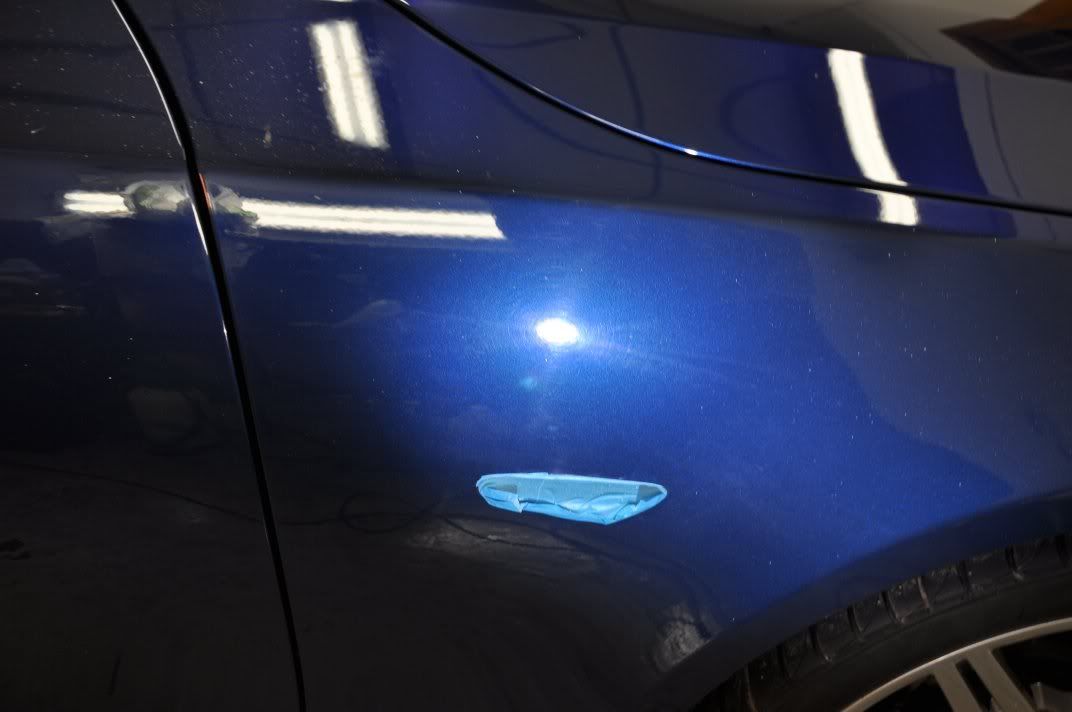
As Gordon was working down the side and round onto the boot, I started off on the driver's side, befores:
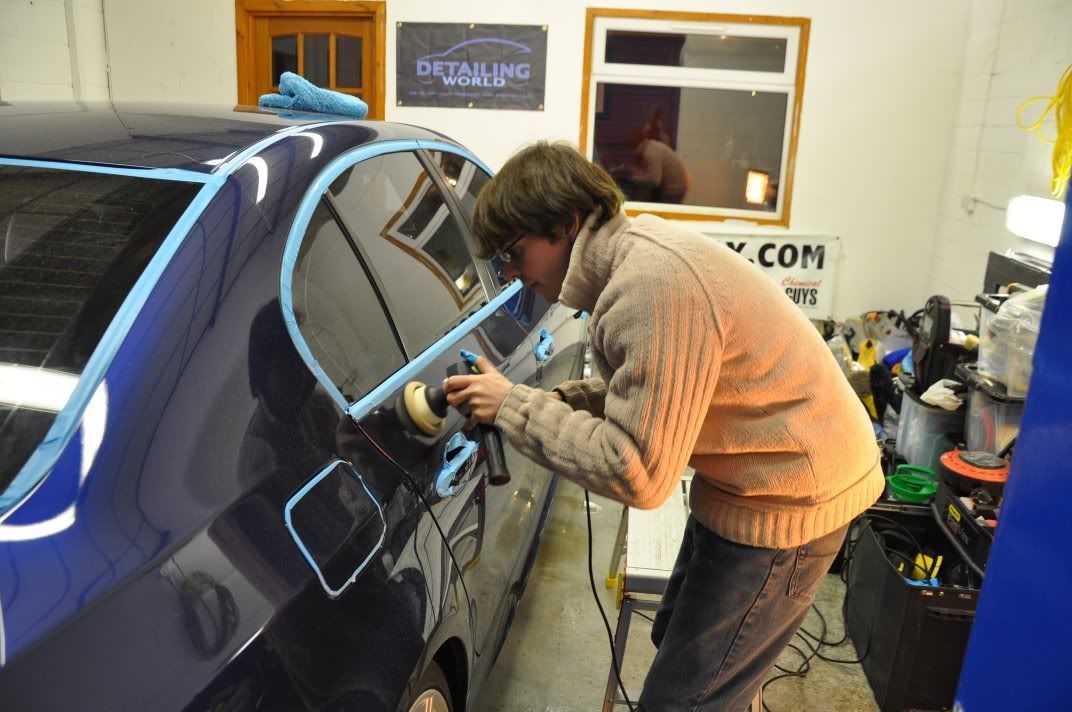
Working away on the sides of the car is where I found the baby Festool rotary to really come into its own... The RAP-80. I know its the RAP-150 that is being raved about currently, but I'll be the first to admit that I personally simply cannot justify its cost - we have one, have had one for months, but I cannot find the extra £200 in it over a Makita 9227CB, bearing in mind that in most situation weight doesn't bother me, its size and ergonomics which are important. Indeed, I find the RAP-150 motor to feel a bit weak compared to the Makita's, bogging slightly under heavy pressue high speed compounding. The RAP-80 however, is a different kettle of fish - like a DA in design, small and very easily manoeverable it is a real joy to use on little sections. Very smooth in use too...
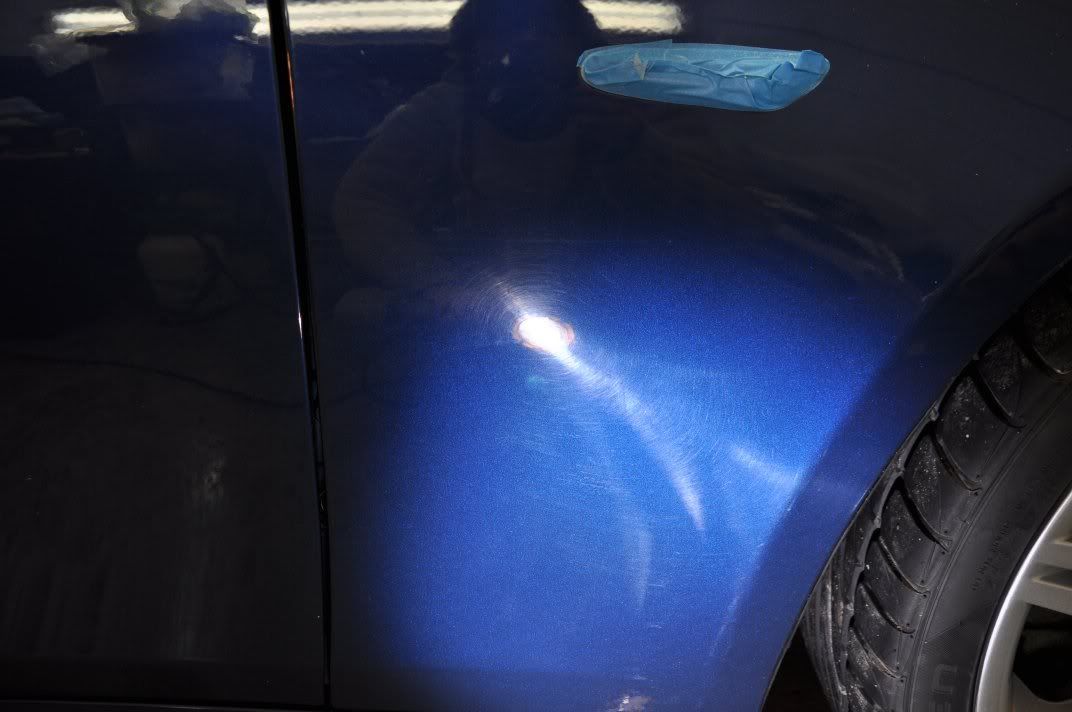
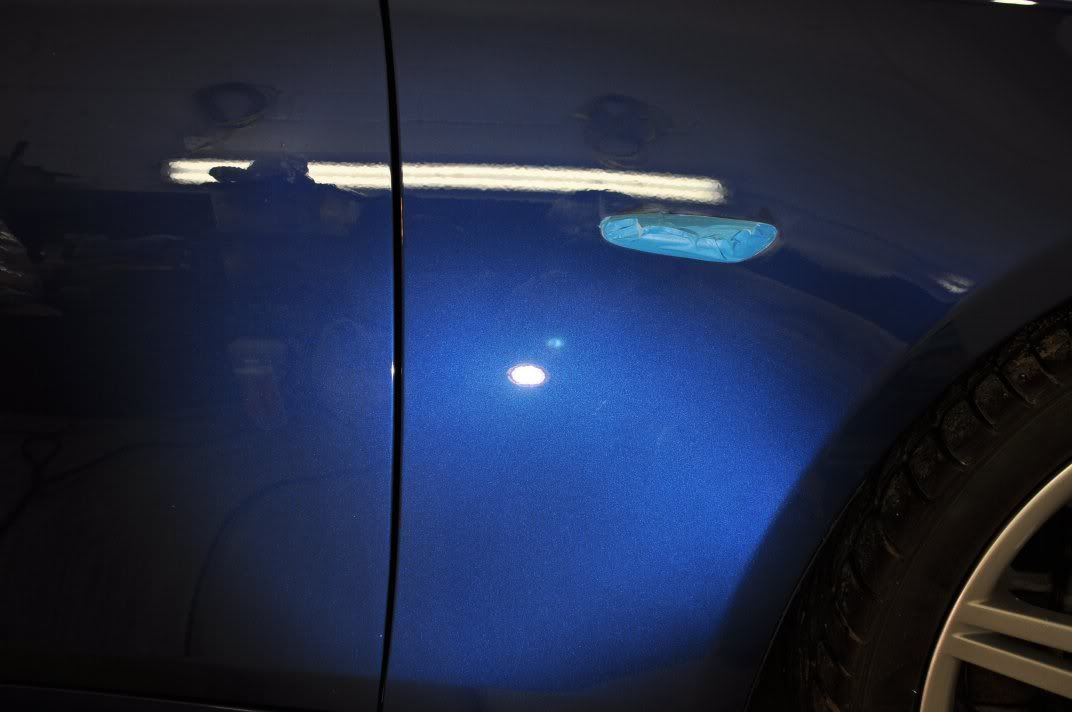
After's from down the side...
Following the correction stages, the car was wiped down with IPA (panel by panel during the machine polishing) and then a full IPA wipedown at the end to ensure the finish is completely free from hologramming and marring and no filling has taken place (mild filling can occur from oils and waxes in polishes if the polishes are not properly worked to their completion).
LSP of choice on this car was to be something durable - Collinite 476S. Call it a wax, sealant, hybrid, alien, however you want to market it... simple fact of the matter is that this is a mighty durable product that we can rely on to last well on a customer's car, and that is what counts for an LSP Thin layers to apply and then swipe test to check for removal, buffed with a Sasquatch towel.
Glass was cleaned with Stoner Invisible Glass. Trim with Chemical Guys New Look Trim Gel, applied lightly and left before being buffed as a final job before car is ready to ensure no streaking. Tyres dressed with Espuma RD-50, wheels with Finish Kare 1000P.
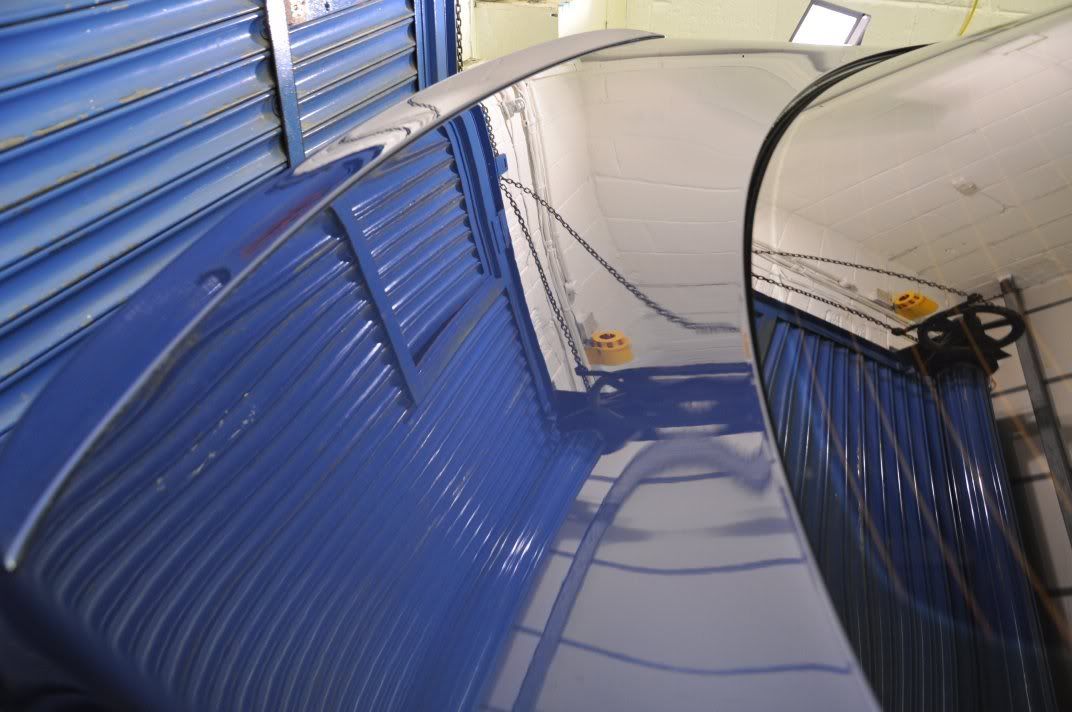
The end results, inside the unit I'm afraid as we finished rather late on this one and had no chance of daylight afters...
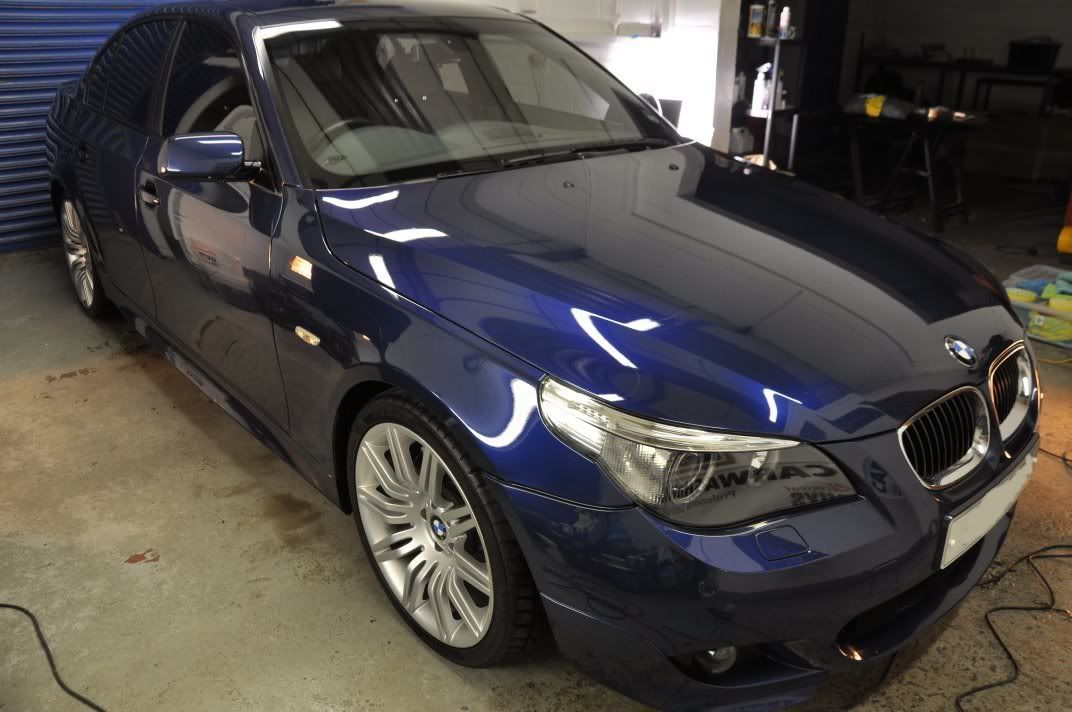
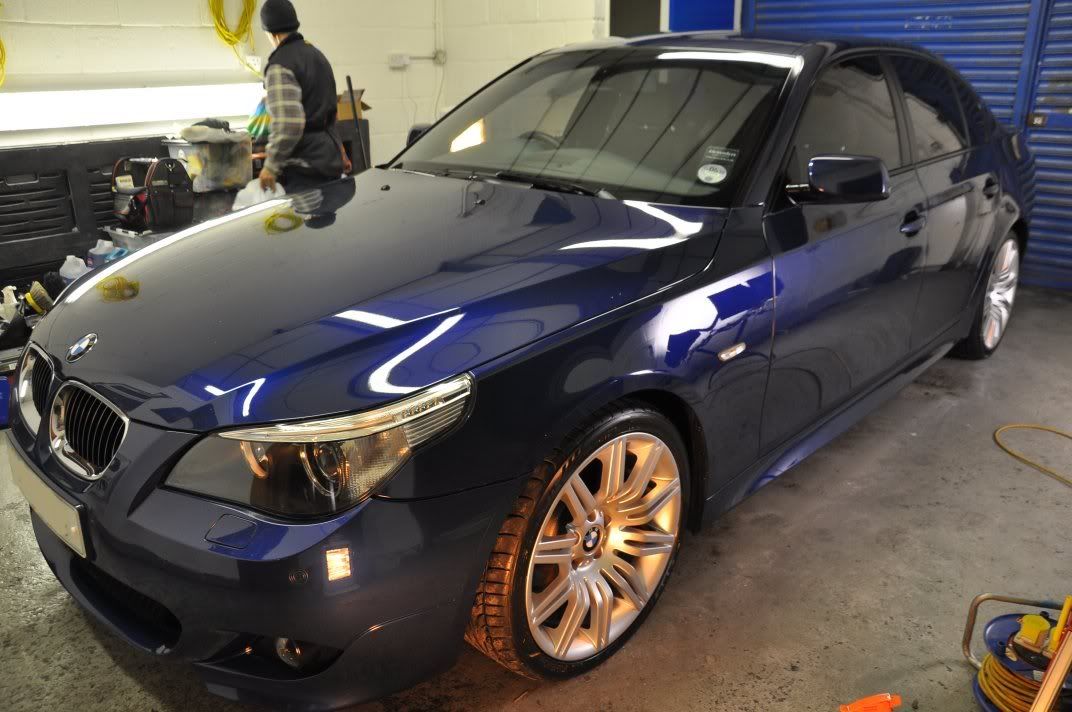
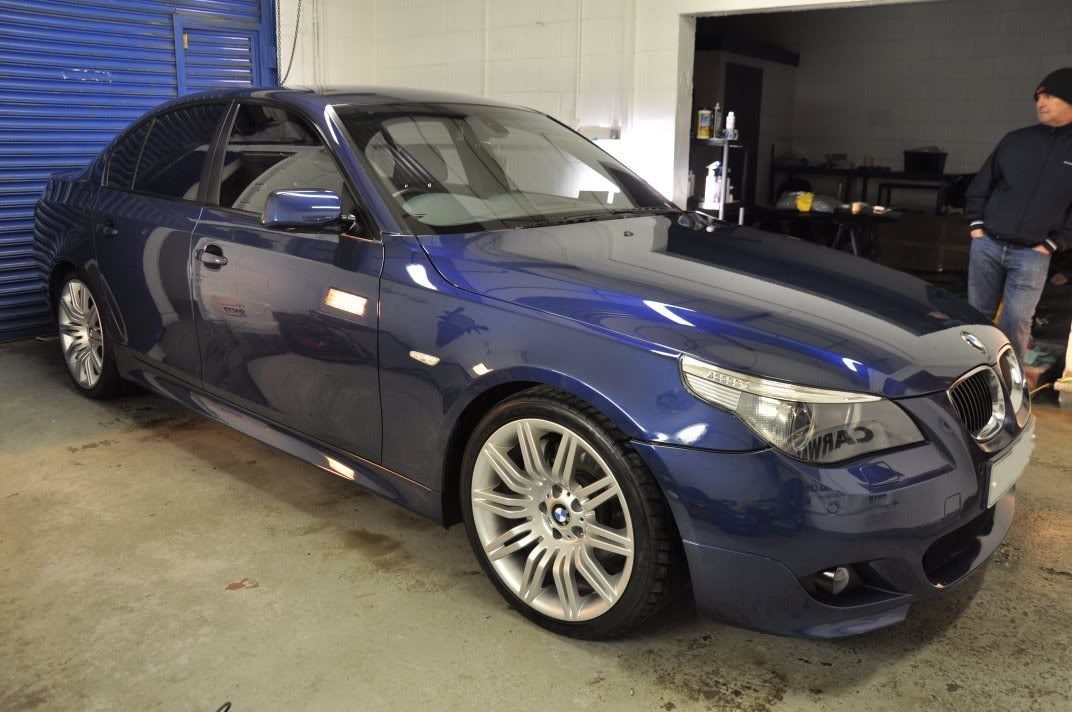

And with big thanks to the owner for sending these pics over as daylight after shots (taken after a drive home in the snow):
First detail of 2010 for us
to this... (photograph taken by owner the day after the detail, after a drive home through the snow - many thanks for getting us daylight shots, as we finished the detail when it was dark!)
Its been a wee while since I last put a writeup in the Studio - upcoming interviews have been taking up a lot of my spare evening time of late so I haven't had much time to writeup our recent details. This detail was carried out in early January, the first of the year for Gordon and myself and a really nice car to kick off 2010 with
Metallic blue E60 535d... The car had recently been purchased by the owner and the supplying dealer appeared to have already polished the car - more on that a little late. First up we had to wrap up nice and warm and set about defrosting the washing the car, which was suffering from the winter salt and snow...Our standard washing techniques were adopted once the car had been defrosted a little, and the car was readied for claying. Using Chemical Guys White clay and Last Touch as the clay lube, we worked round the car... Once fully clayed it allowed us to see the extent of the damage that had been caused to the paint by the previous polishing efforts!
One of the good things about working in a team is that throughout the detail, Gordon and I fall into working on our own sections of the car and its pretty much the same every detail! I kick off on the bonnet and head down driver's side, Gordon starts on passenger side and heads round onto the boot... Kicking off on the bonnet, we can see where the previous machine polishing efforts had been taking place...
Gordon started off on the passenger side, and the hologramming was pretty bad round there too...
Looking further down the passenger side it was evident this whole car had been machine polished already, with moderate to severe hologramming across the board. Worse were regions where it appeared the buffing mop/pad had picked up grit and had left deep circular pigtail like RDS which were going to proove much tougher to remove. More befores from passenger side...
As is traditional (an imo essential) on all our details, we start by assessing the paint we have in front of us with no prior assumptions about hardness or type... treat every car as an individual and learn the paint type in front of you. To assess the hardness and how much correction is required we work on a test spot starting with the lightest combination we have first and building up through the levels till the desired correction is reached. Removal rates are checked for every combo and used as a guide to what is safe and what is not.
On the bonnet, owing to the deep pigtail RDS consistently across the panel, I opted for 3M Fast Cut Plus following the paint assessment using a Chemical Guys Yellow Cutting Pad. One or two sets were used, as required, to give the results required. Application was as follows:
At this stage, no refinement of the finish was carried out... The Fast Cut was simply used as a correction compound to remove the marks, so the sets were continuously adjusted to suit the paint in front of me. The odd deeper pigtail remained but with between 7 and 10um of paint removed from two hits of FC+, I decided that the best option following the compounding was an intermediate stage with Menzerna PO85RD3.02 Intensive Polish on a 3M Yellow polishing pad. The little extra bite here helped to "round off" the deeper RDS a bit more to make them less noticeable where full removal was not possible owing to paint thickness considerations. Sometimes it is necessary to box a little clever to get the result you are after as blindly removing paint until all the marks are gone can leave critically thin regions which preclude further polishing and can adversely affect the life of the clearcoat. Intensive Polish was applied as follows...
Again, no refining stage was carried out here as this was saved for the finishing polish stage. Finishing polish of choice was, as always for us owing to its felxibility, Meguiars #205 Ultra Finishing Polish. This time applied using a Chemical Guys Black Hexlogic pad as follows...
On the bonnet, owing to the deep pigtail RDS consistently across the panel, I opted for 3M Fast Cut Plus following the paint assessment using a Chemical Guys Yellow Cutting Pad. One or two sets were used, as required, to give the results required. Application was as follows:
- Spread at 600rpm
- Begin working at 1200rpm, light pressure and fast machine movements to spread residue and begin working
- Work at 2000rpm, moderate pressure, with steady machine movements until residue clear or marks removed
At this stage, no refinement of the finish was carried out... The Fast Cut was simply used as a correction compound to remove the marks, so the sets were continuously adjusted to suit the paint in front of me. The odd deeper pigtail remained but with between 7 and 10um of paint removed from two hits of FC+, I decided that the best option following the compounding was an intermediate stage with Menzerna PO85RD3.02 Intensive Polish on a 3M Yellow polishing pad. The little extra bite here helped to "round off" the deeper RDS a bit more to make them less noticeable where full removal was not possible owing to paint thickness considerations. Sometimes it is necessary to box a little clever to get the result you are after as blindly removing paint until all the marks are gone can leave critically thin regions which preclude further polishing and can adversely affect the life of the clearcoat. Intensive Polish was applied as follows...
- Spread at 600rpm
- Begin working at 1200rpm slow passes with light pressure until residue evenly spread building a little heat in the panel
- Work at 1800rpm until residue clear, moderate pressure lightening at end of the set with steady machine movements
Again, no refining stage was carried out here as this was saved for the finishing polish stage. Finishing polish of choice was, as always for us owing to its felxibility, Meguiars #205 Ultra Finishing Polish. This time applied using a Chemical Guys Black Hexlogic pad as follows...
- Spread at 600rpm
- Begin working at 1200rpm with light pressure and slow machine movements
- Work at 1500rpm with moderate pressure and steady machine movements
- Refine at 1200rpm, light pressure and slow machine movements
- Burnish at 900rpm, light pressure (supporting weight of the machine) and very slow machine movements
The end result of this (and a good three hours behind the rotary!) on the bonnet was:
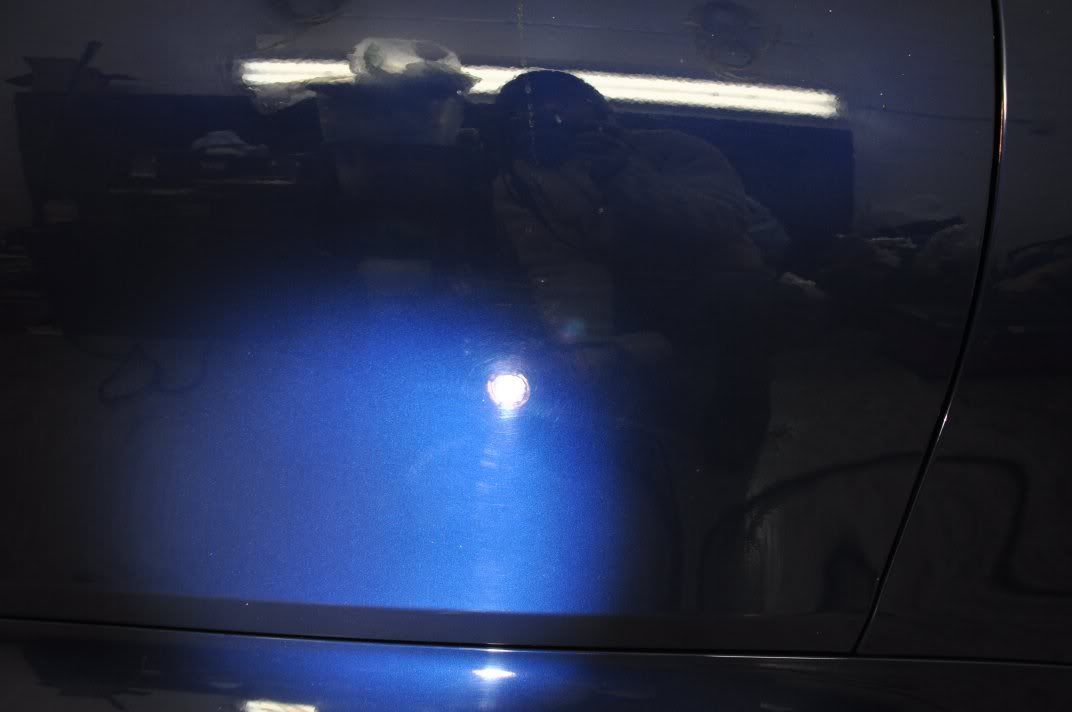
Checked for finish quality under the Sun Gun - no holograms here
:With the hologramming and marring removed, a new depth had been restored to the finish and the colour turned out to be a really lovely deep blue - one of BMW's best? I reckon so.
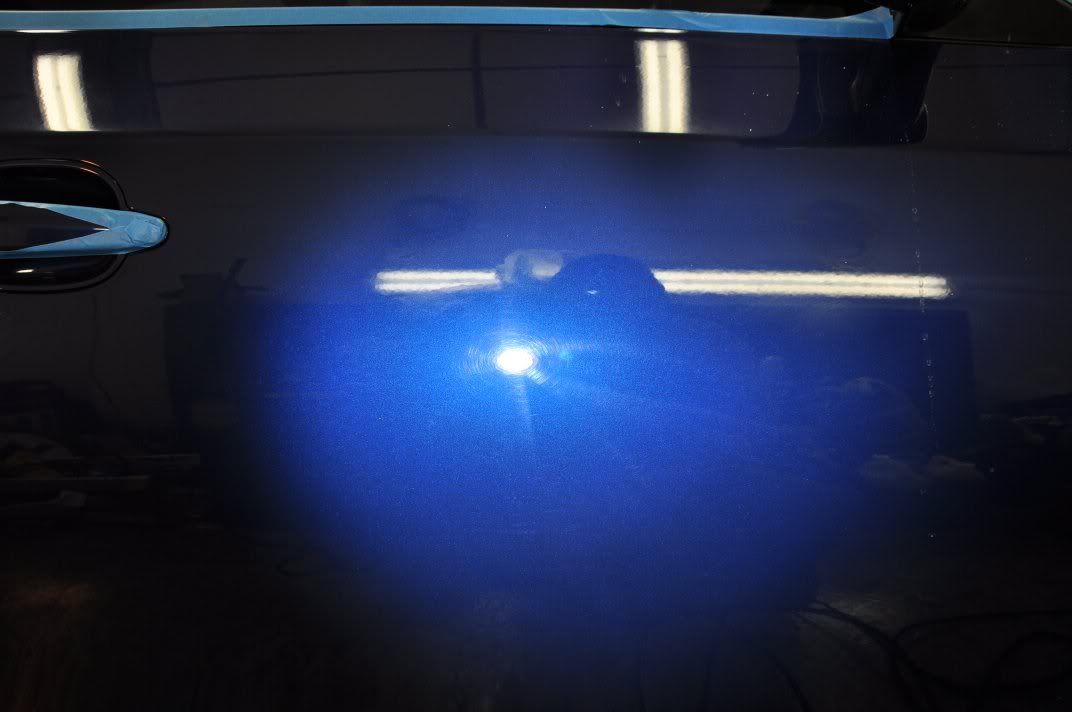
Meanwhile, round at Gordon's side, Gordon was enjoying a similar process of heavy compounding, middle polish and finishing polish as described above, turning the previosuly hologrammed and marred paint into the following...
As Gordon was working down the side and round onto the boot, I started off on the driver's side, befores:
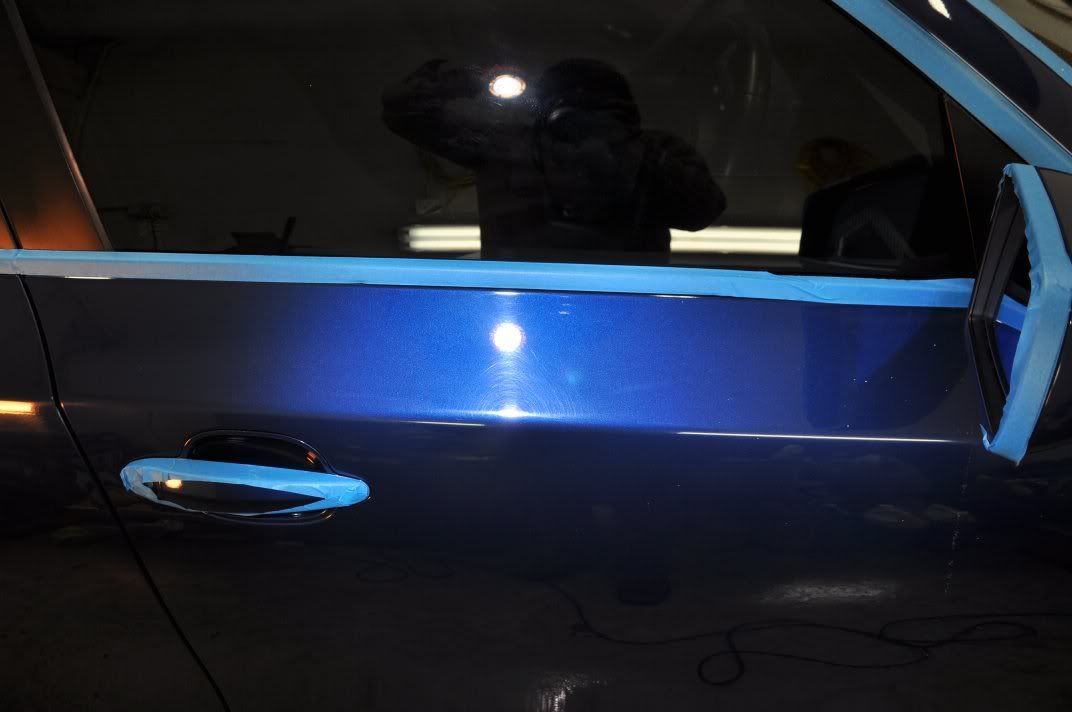
Working away on the sides of the car is where I found the baby Festool rotary to really come into its own... The RAP-80. I know its the RAP-150 that is being raved about currently, but I'll be the first to admit that I personally simply cannot justify its cost - we have one, have had one for months, but I cannot find the extra £200 in it over a Makita 9227CB, bearing in mind that in most situation weight doesn't bother me, its size and ergonomics which are important. Indeed, I find the RAP-150 motor to feel a bit weak compared to the Makita's, bogging slightly under heavy pressue high speed compounding. The RAP-80 however, is a different kettle of fish - like a DA in design, small and very easily manoeverable it is a real joy to use on little sections. Very smooth in use too...
After's from down the side...
Following the correction stages, the car was wiped down with IPA (panel by panel during the machine polishing) and then a full IPA wipedown at the end to ensure the finish is completely free from hologramming and marring and no filling has taken place (mild filling can occur from oils and waxes in polishes if the polishes are not properly worked to their completion).
LSP of choice on this car was to be something durable - Collinite 476S. Call it a wax, sealant, hybrid, alien, however you want to market it... simple fact of the matter is that this is a mighty durable product that we can rely on to last well on a customer's car, and that is what counts for an LSP
Thin layers to apply and then swipe test to check for removal, buffed with a Sasquatch towel. Glass was cleaned with Stoner Invisible Glass. Trim with Chemical Guys New Look Trim Gel, applied lightly and left before being buffed as a final job before car is ready to ensure no streaking. Tyres dressed with Espuma RD-50, wheels with Finish Kare 1000P.
The end results, inside the unit I'm afraid as we finished rather late on this one and had no chance of daylight afters...
And with big thanks to the owner for sending these pics over as daylight after shots (taken after a drive home in the snow):
First detail of 2010 for us
'About Car' 카테고리의 다른 글
| FocusRs in PerformanceBlue - HeavenlyDetail (2) | 2010.02.06 |
|---|---|
| Suzuki GSX-R - Auto Finesse (0) | 2010.02.05 |
| 911 Targa S - Polished Bliss (4) | 2010.02.02 |
| Maserati MC12 Mega Wrietup - 135pics + Videos [번역] (4) | 2010.01.30 |
| Lamborghini Gallardo LP 560 Detail -vxrmarc (1) | 2010.01.30 |